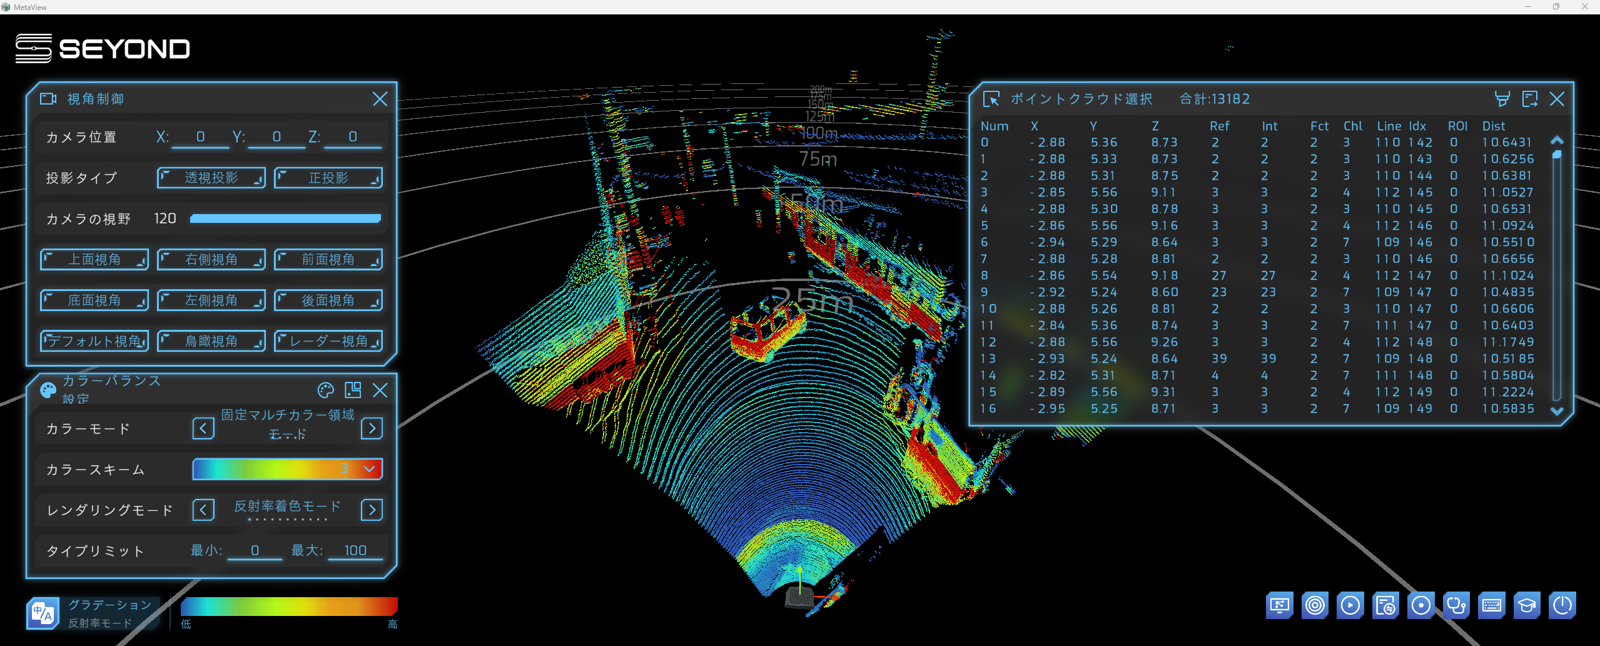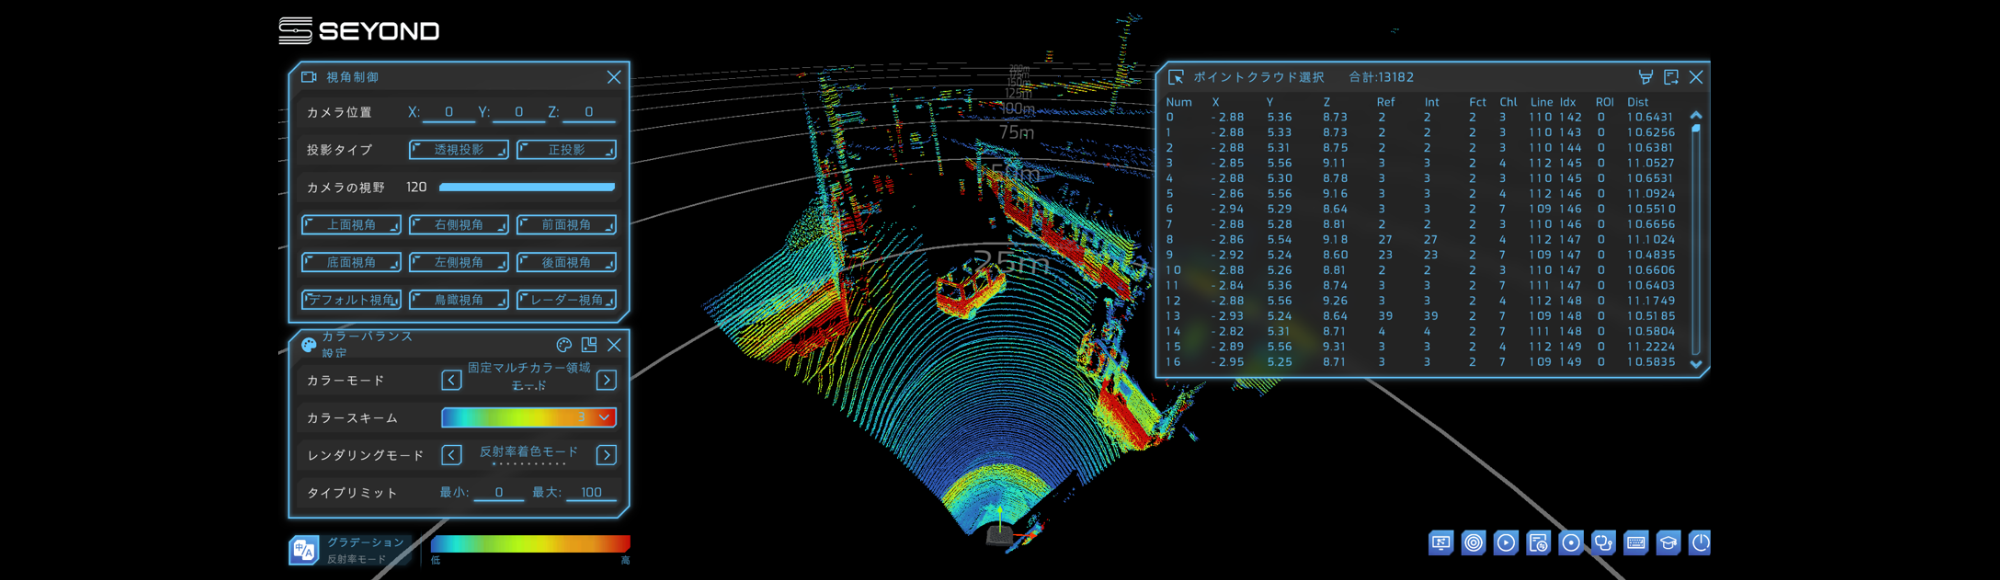
MetaView is a point cloud viewer provided by Seyond specifically for their in-house LiDAR. No installation is required, and after a simple registration, you can download it from the website and start using it right away.
Operation is intuitive and GUI-based, and in addition to visualizing 3D point cloud data, it also supports recording, playback, and analysis functions.
Following on from the previous basics article, this intermediate article will clearly introduce some useful on-site features with examples to help first-time users get started more smoothly.
Please try out MetaView, which combines intuitive operability with multifunctionality.
*For details on each function, please refer to the provided manual.
[MetaView Application Note]
*This column is written for the latest MetaView Ver. 1.5.5 as of January 2026.
1. Recording LiDAR acquired point cloud data
This article is a quick manual for those who own Seyond LiDAR, and it assumes that you have downloaded the software and manual from the website and have already set up an environment in which you can use it. If you have not done so, please first refer to the previous article, "How to use MetaView, the viewer for Seyond LiDAR (Basics)," and make the necessary preparations in advance, such as setting up the software and connecting the LiDAR.
How to use Seyond's LiDAR Viewer MetaView (Basics)
1. Point cloud data recording procedure (file creation)
MetaView can record the displayed LiDAR point cloud data and also play back the recorded data. It supports a variety of settings, but here we will introduce the basic usage.
1. Point cloud recording button
Click the Record button on the bottom right function key.
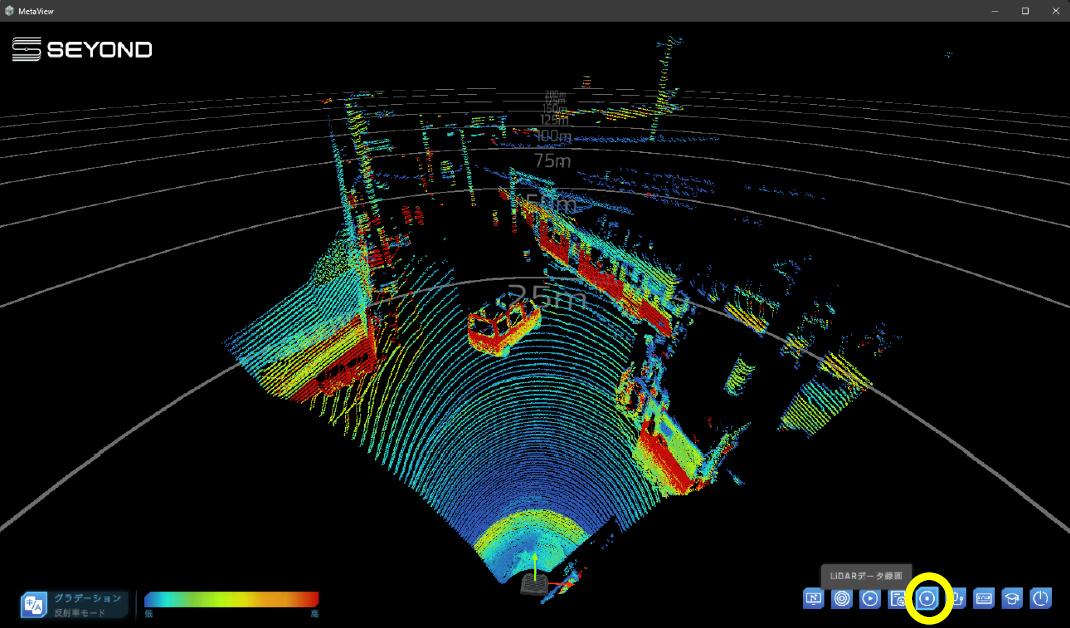
LiDAR data recording button on the bottom right

Click the LiDAR data recording button
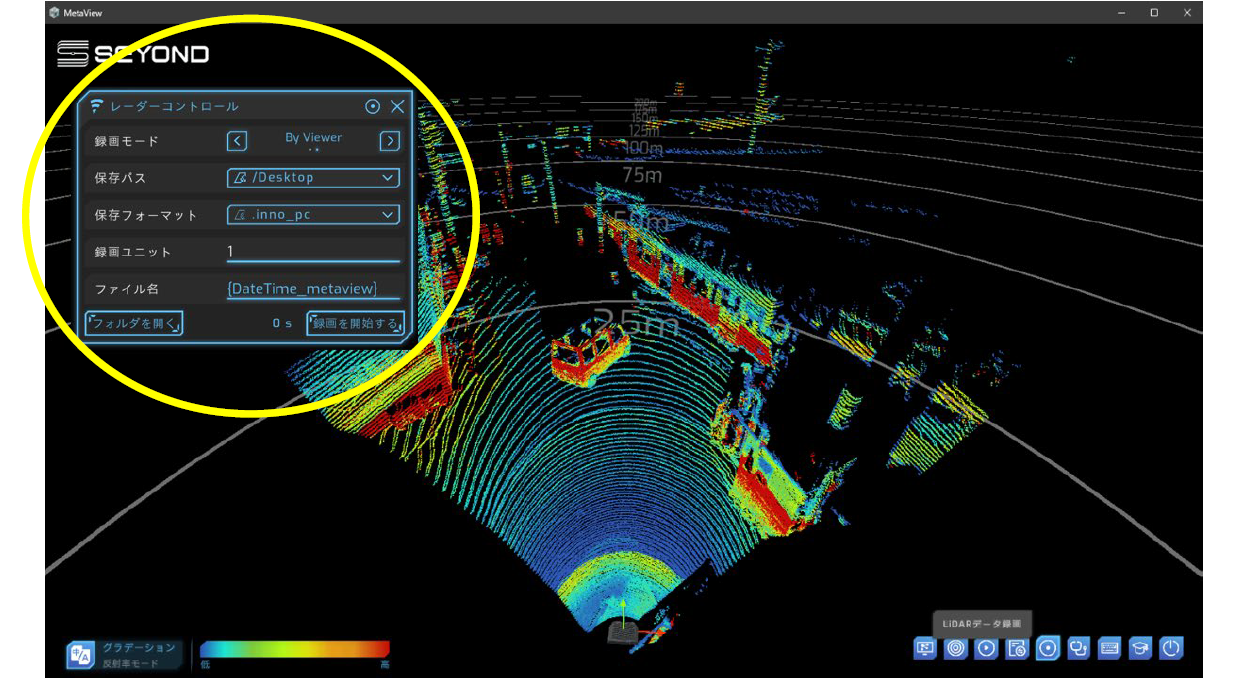
The radar control menu will appear as shown above.
2. Recording time setting
The control menu has the following items: recording mode, save path, save format, recording unit, and file name, but basically everything except the recording unit is available by default.
The default recording unit is "1", which is the number of seconds of recording time, meaning 1 second of recording.
Therefore, we would like you to change the time to your liking, and we usually recommend 15, 30, or 60 seconds.
OTHERS, you can also change the save path etc.
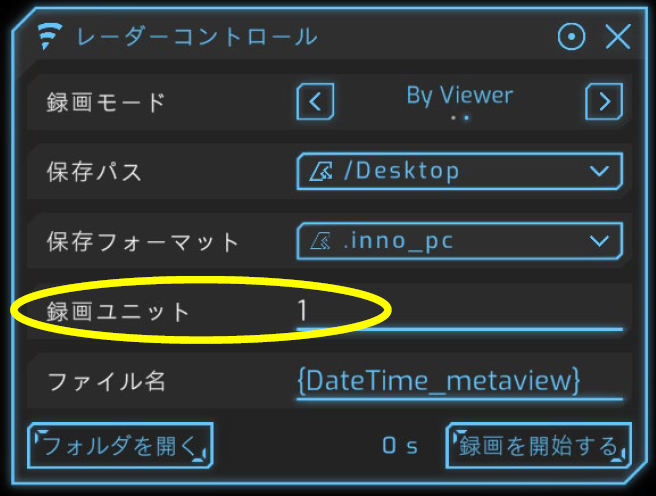
Radar Control Menu
3. Start recording
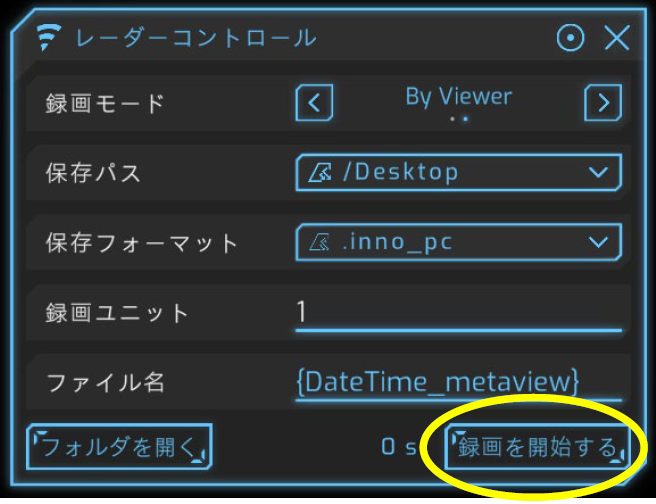
Recording can be started by clicking the "Start Recording" button at the bottom of the radar control menu.
When recording is complete, a file with a name based on the date and time, such as "20260110143555_MetaView.inno_pc", will be created on your PC's desktop (default) or in a directory of your choice.
*The above is a file created at 14:35:55 on January 10, 2026.
File name: yyyymmddhhmmss_MetaView.inno_pc
2. Playback of recorded point cloud data
Recorded point cloud files can be easily played back by following the steps. First, select the point cloud file you want to play and then run the playback function. During playback, you can check the status of the point cloud using basic operations such as moving the viewpoint and zooming in and out. Pause and resume as needed to efficiently view the desired scene.
The playback procedure is as follows:
1. How to play back recorded data
Click Local Point Cloud Player from the function keys at the bottom right.
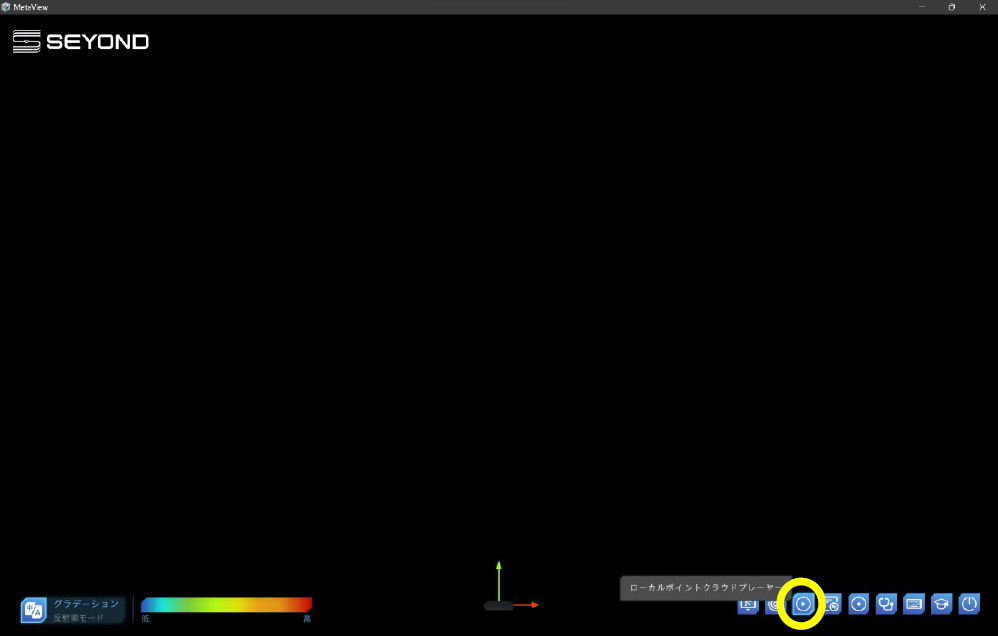
Local point cloud player button on the bottom right

Local Point Cloud Player Button
Second circular icon Click to open the control window shown below.

Left folder icon Simply click and the system file selector will automatically pop up. Select the point cloud file you want to play and playback will begin.
Default file storage location = Desktop
■TIPS
Default point cloud file name = yyyymmddhhmmss_MetaView.inno_pc
Example: 20260210100407_MetaView.inno_pc
2. How to return to LiDAR point cloud display
Stop playing the recorded data and switch to viewing the LiDAR input.
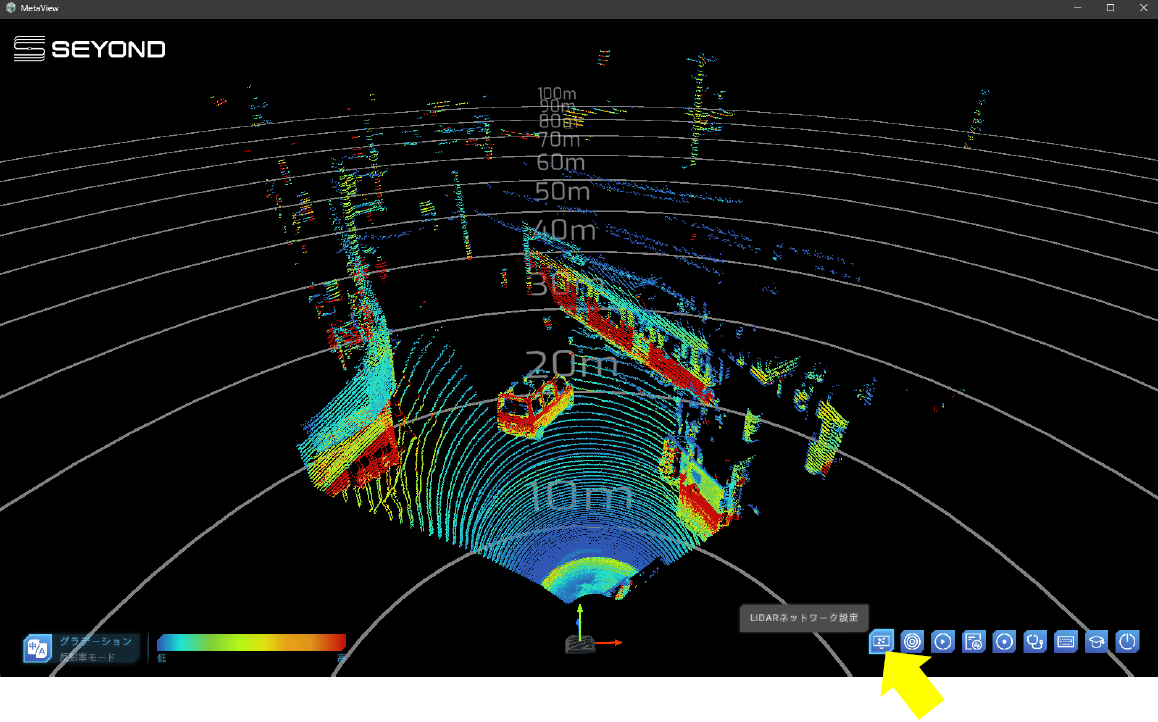
Click the LiDAR Network Settings button in the bottom right

LiDAR network settings button
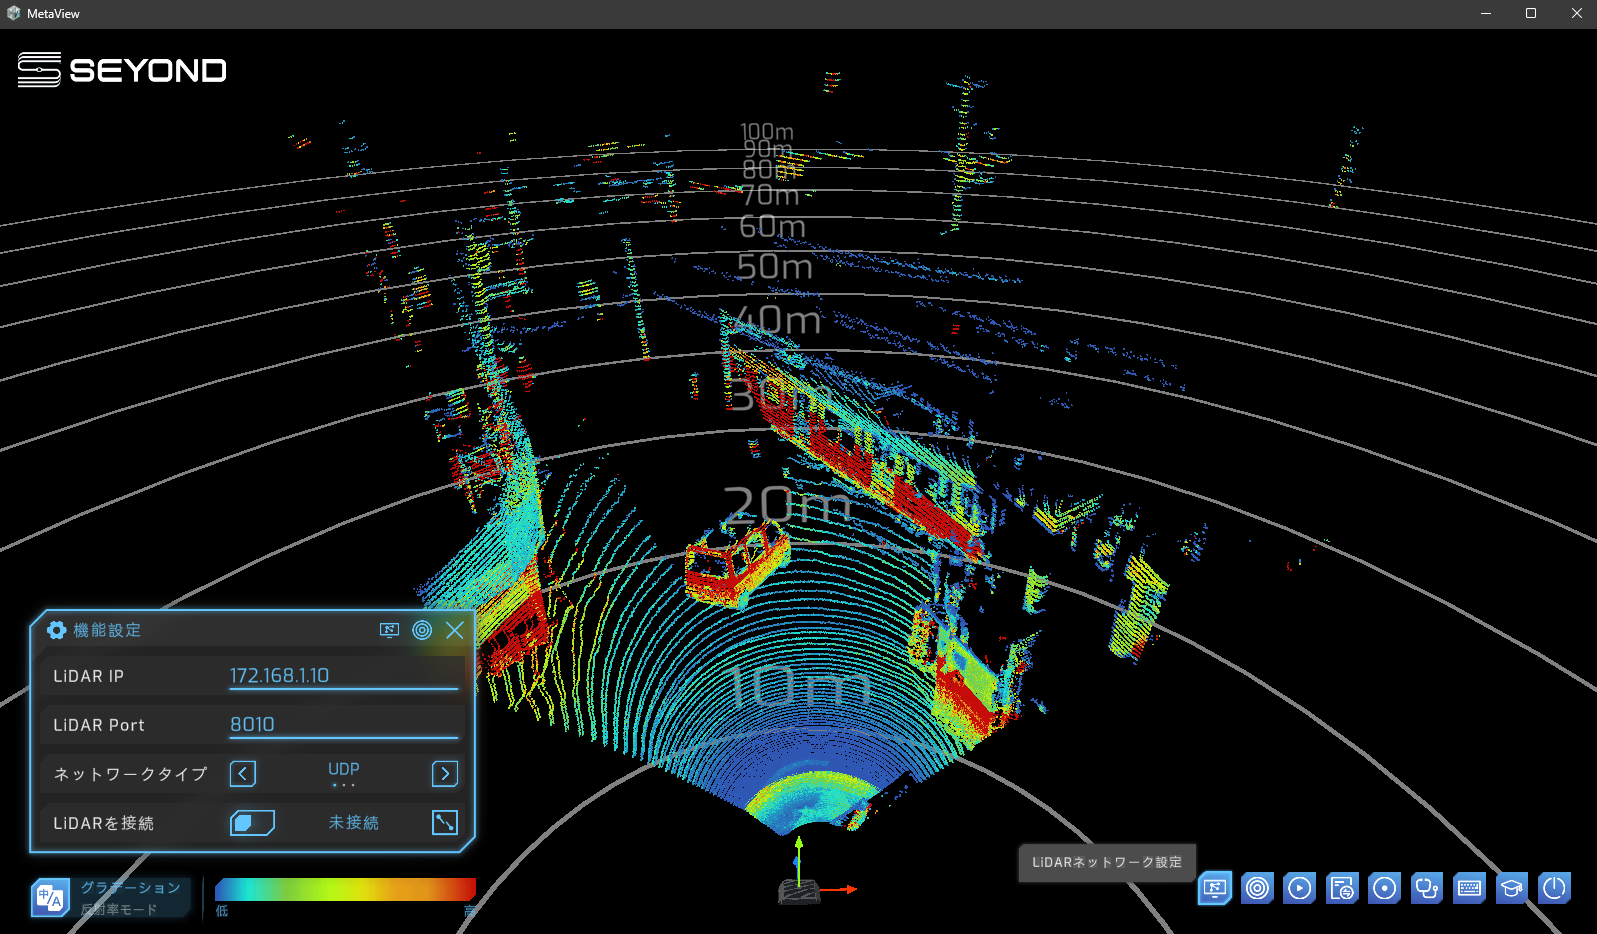
The function settings menu will appear in the bottom left
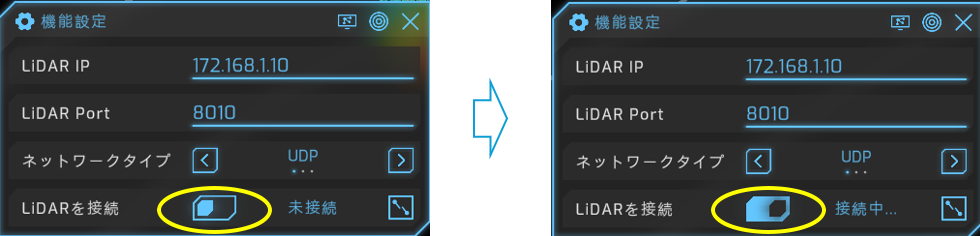
Click the “Connect LiDAR” button to connect the LiDAR.
The display will switch to the LiDAR point cloud.
3. Grid line display
MetaView also allows you to adjust settings such as grid line visibility and display style. Here we will show you how to control grid line visibility as you wish.
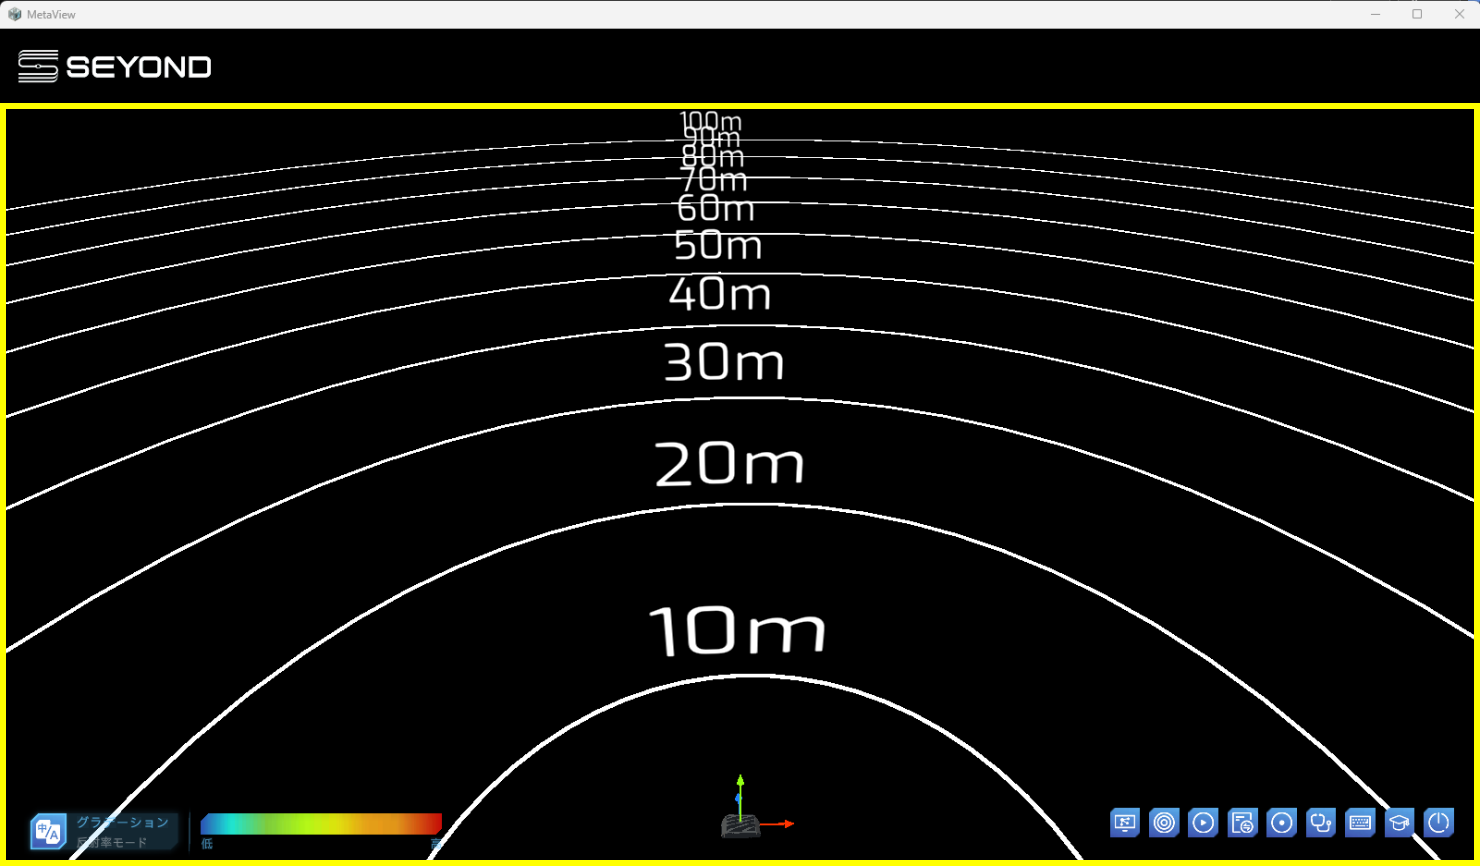
Grid Lines - Displays lines at set intervals that represent the distance from the LiDAR
1. Show/hide grid lines
Click the Radial Grid button from the function keys at the bottom right.
Click the second circular icon Radial Grid Icon to open the control window.
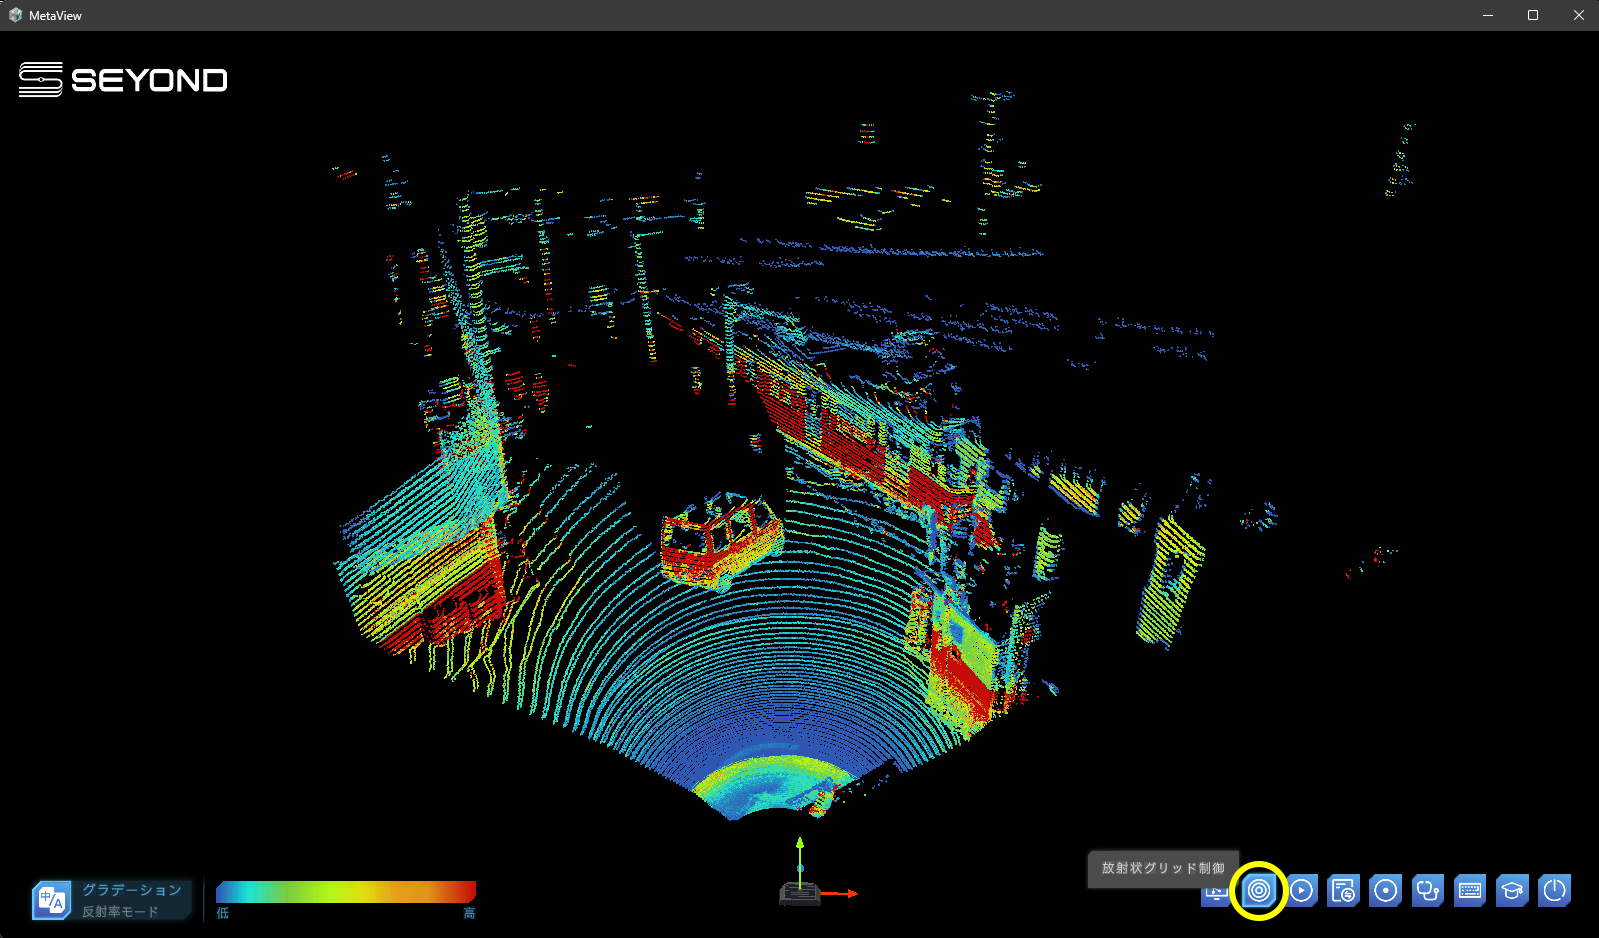
Click the Radial Grid button in the bottom right
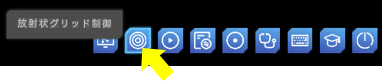
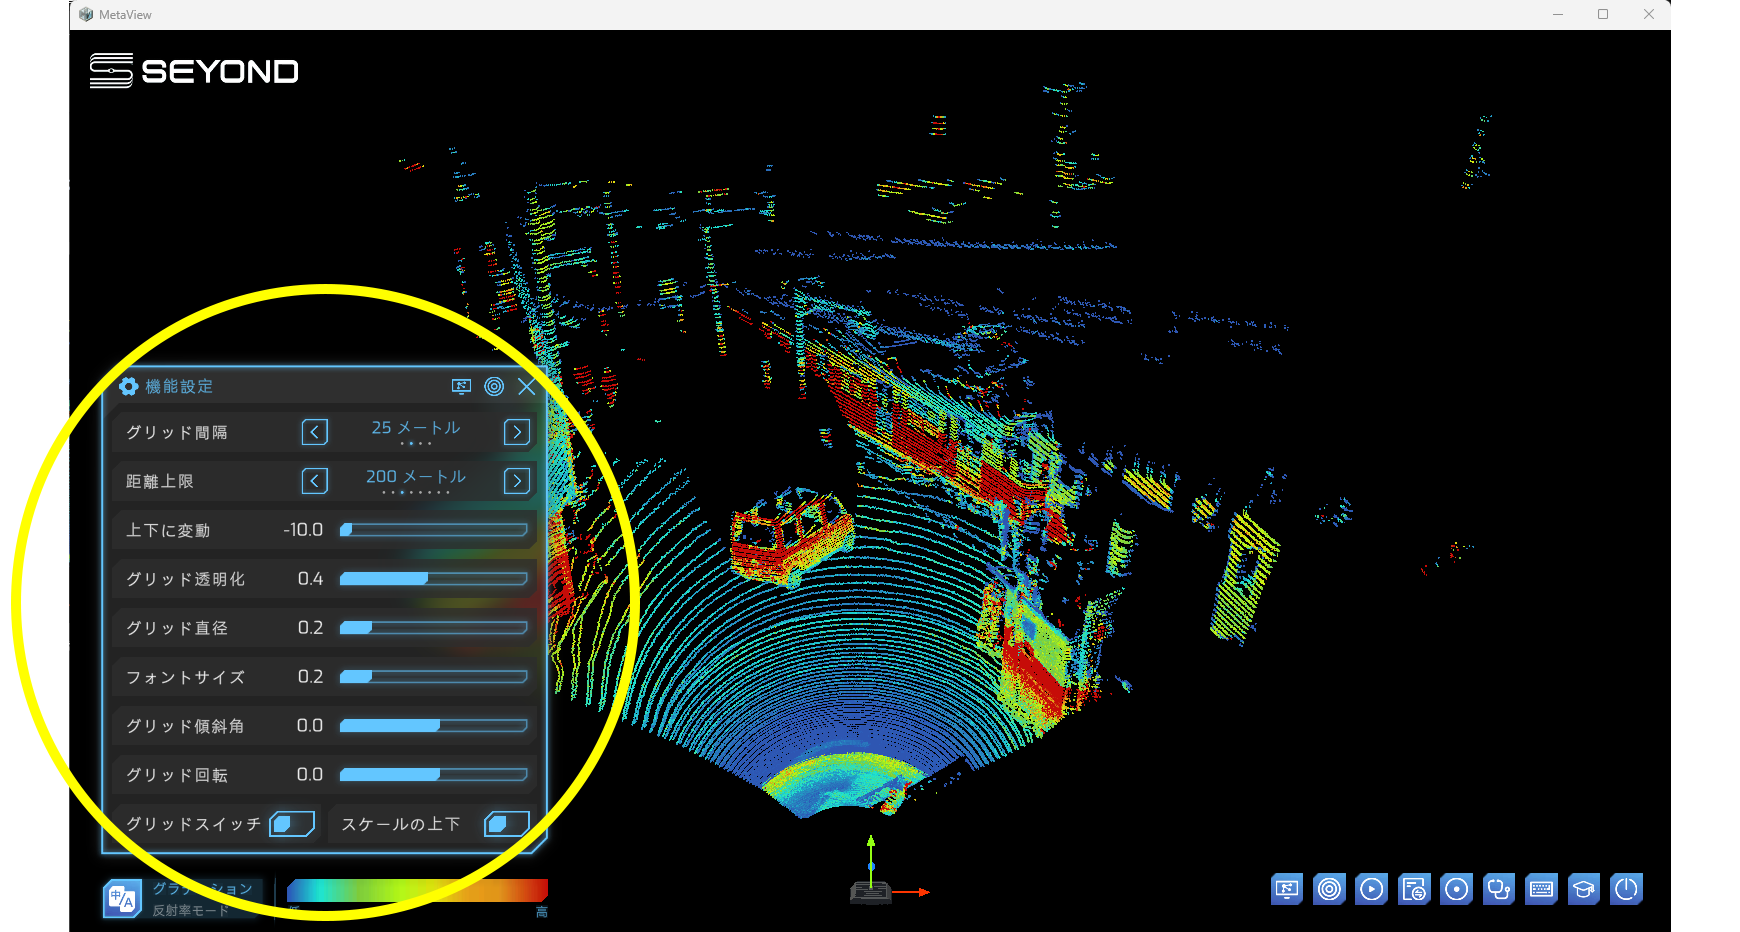
The function settings menu will be displayed.
You can toggle the grid display on and off using the grid SWITCHES at the bottom.
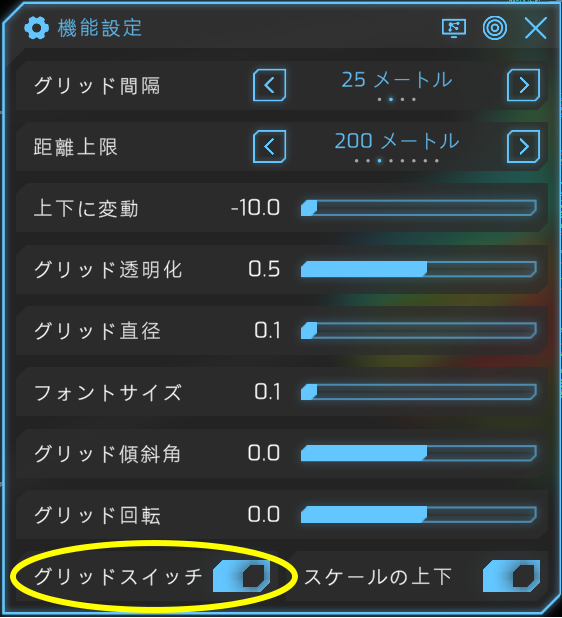
Grid SWITCHES at the bottom of the menu
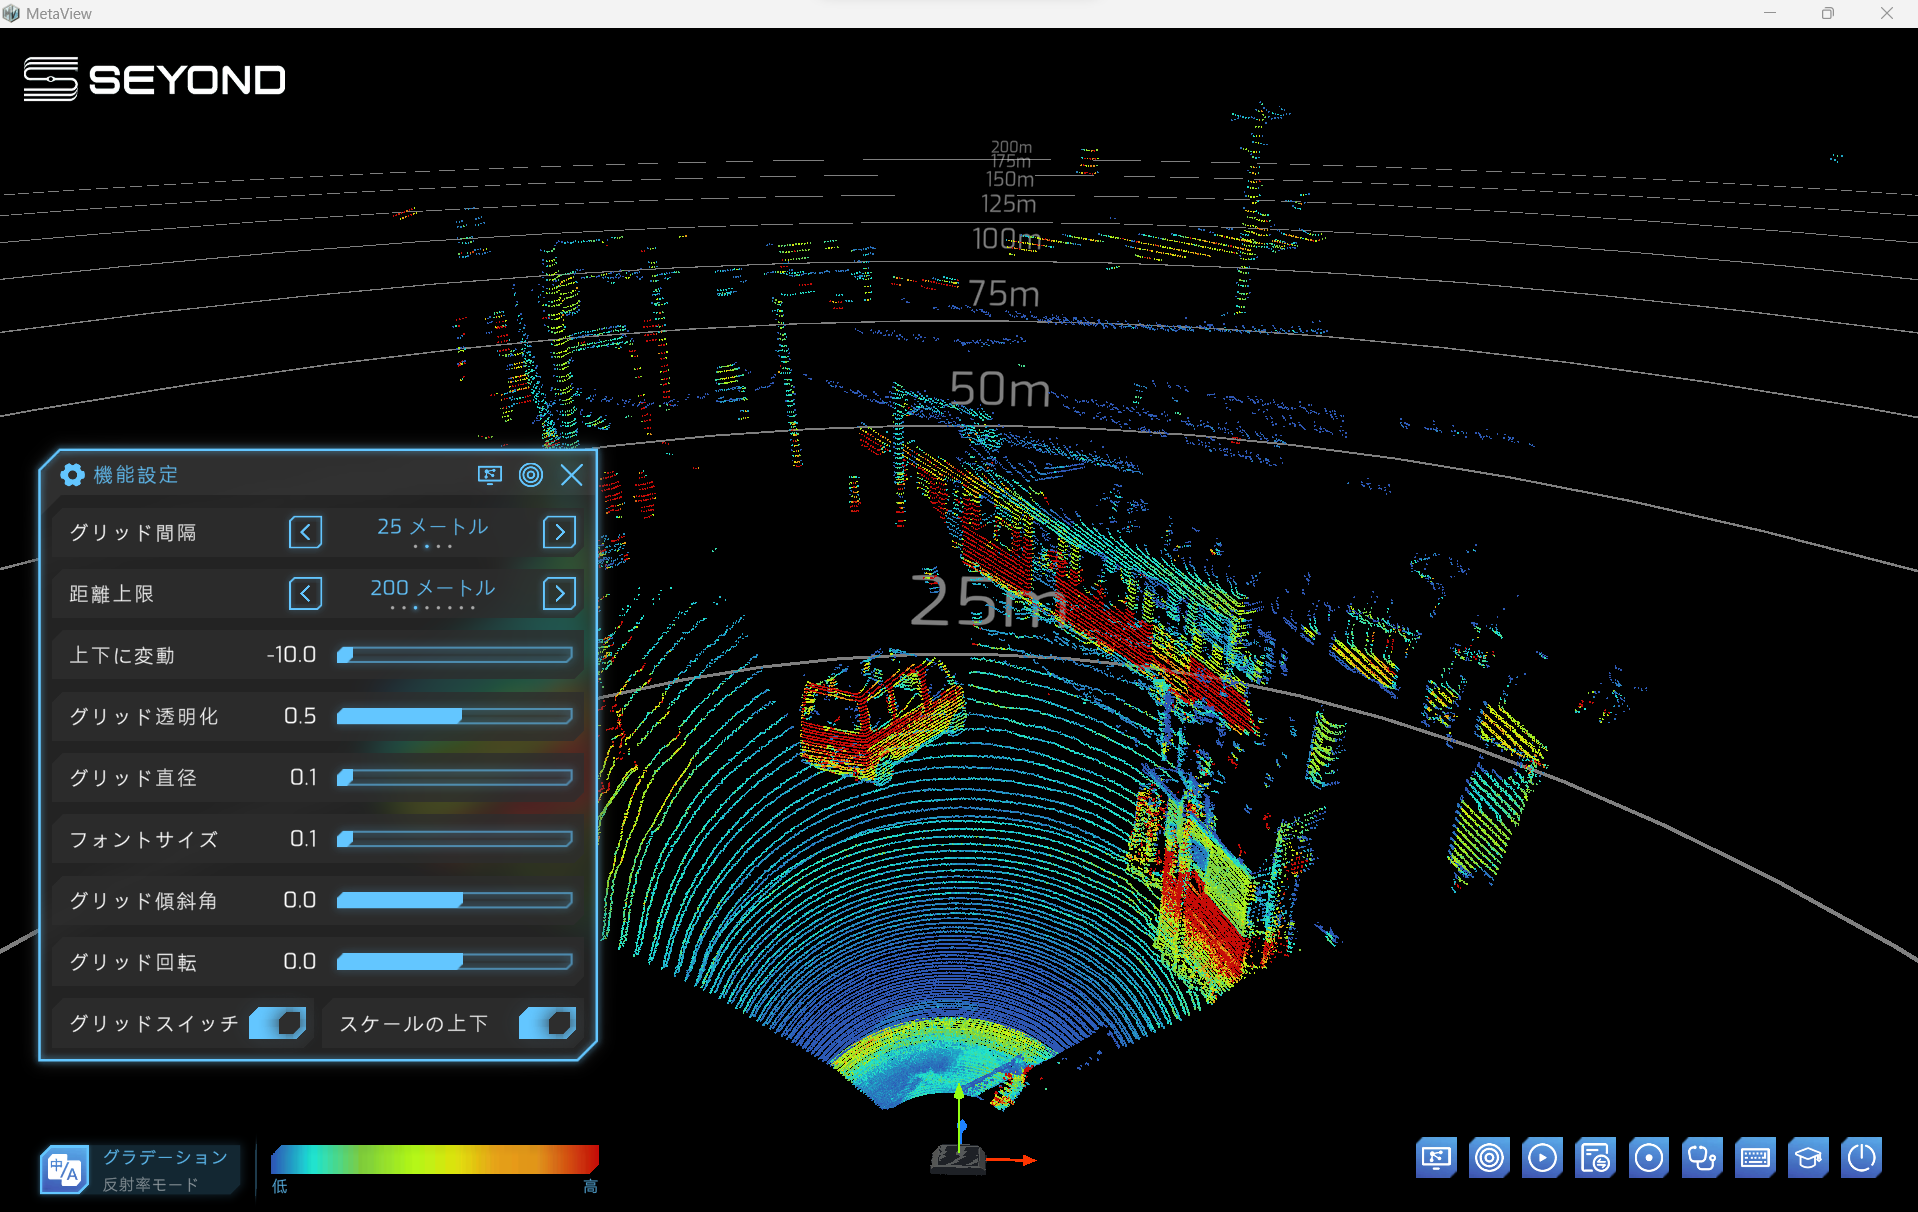
Grid lines are displayed
2. Display settings
MetaView allows you to configure various settings related to grid display. You can change the grid spacing, line thickness, numerical display size, etc. to suit your needs. In this column, we will explain "grid spacing" and "display limit distance" as typical examples.
1. Grid spacing
You can choose the grid line spacing from the following four levels:
10m/25m/50m/100m
2. Setting the grid display distance limit
You can set the maximum distance (limit) at which the grid is displayed. For example, if you set the limit distance to 200m, the grid beyond that distance will not be displayed.
■TIPS
*The grid may be too noticeable if left at its default settings. As shown in the image above, adjusting the grid line width (thickness) and font size to make it more subtle will make the point cloud easier to see.
3. Point cloud confirmation (analysis)
1. Check the point cloud of any part
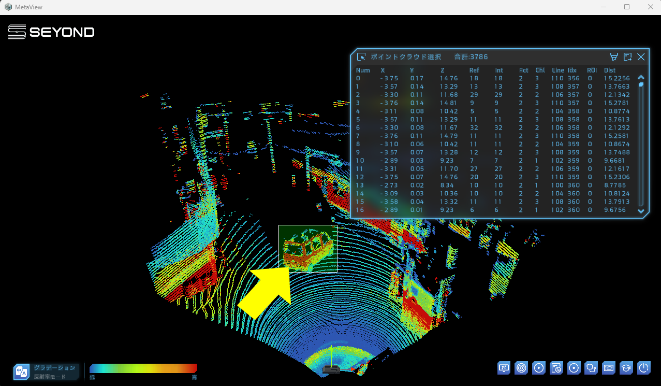
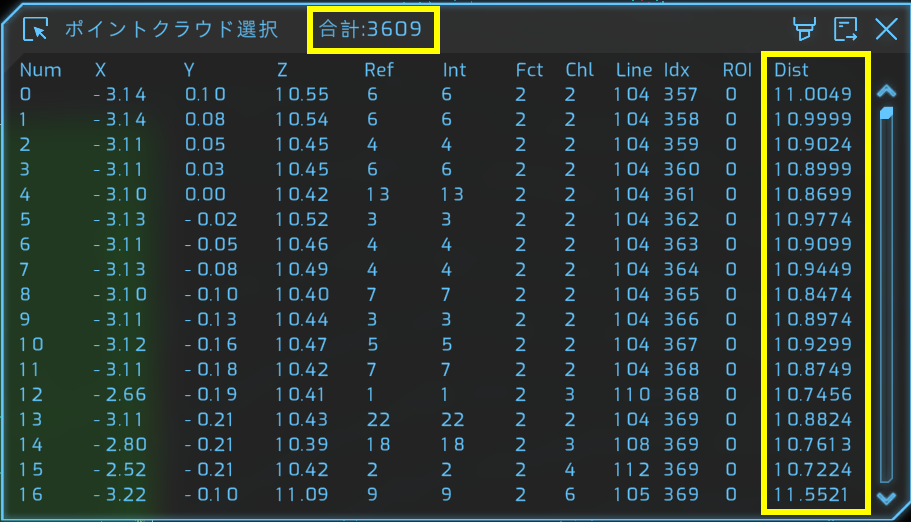
You can display point cloud information for the selected area by holding down the "z" key and dragging the left mouse button on the screen to specify the range of points you want to check. This is a convenient function for checking the number of points contained in an object and understanding distances.
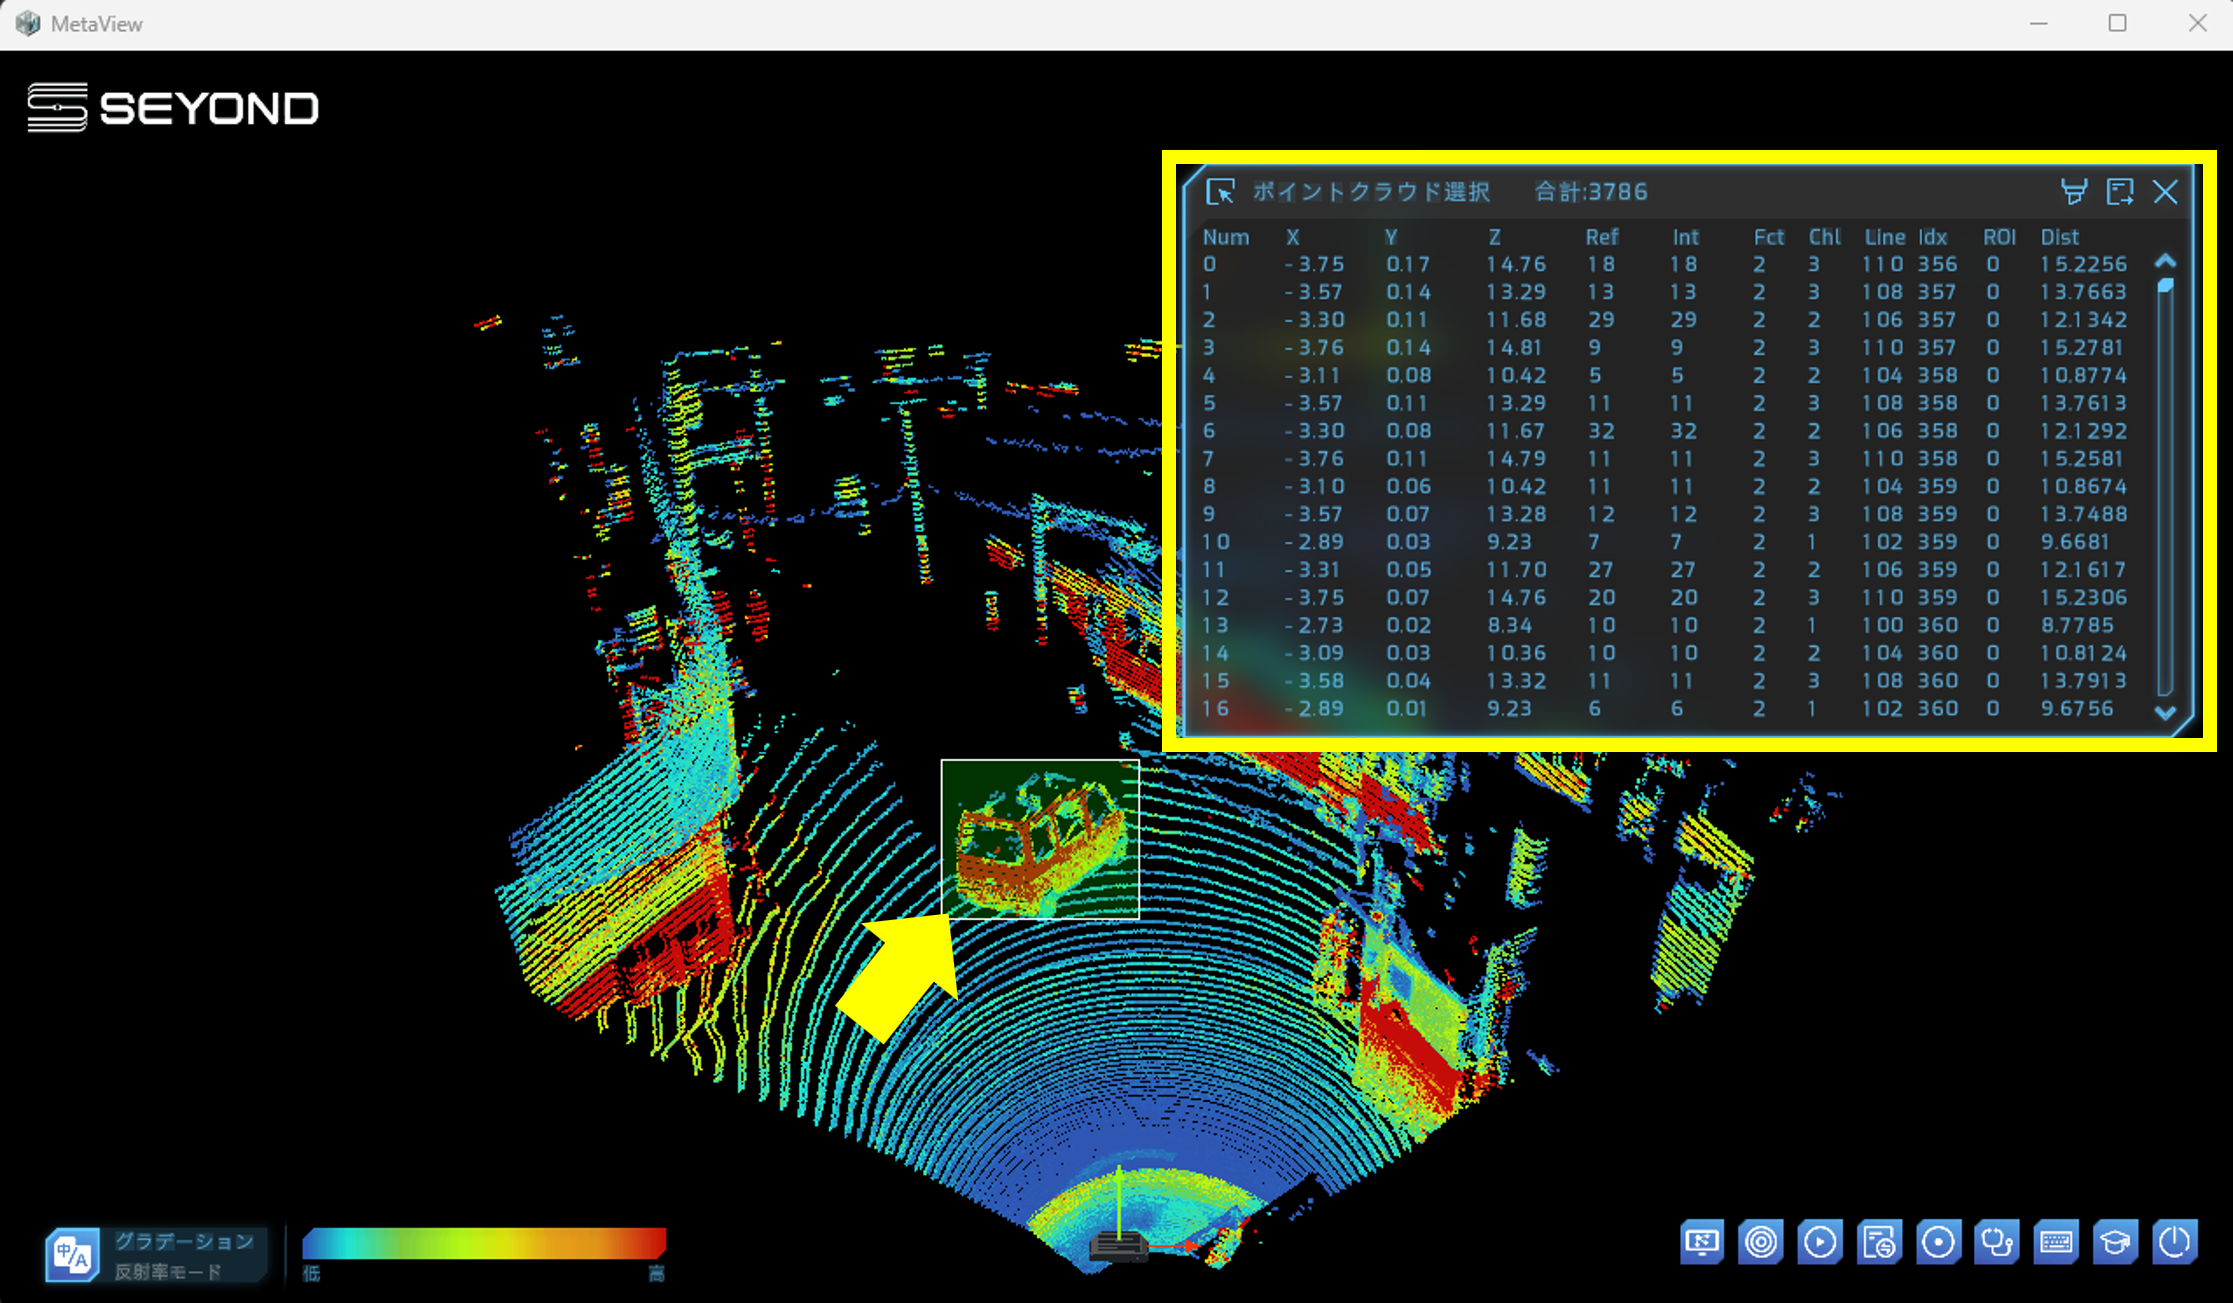
Point cloud information for the selected area indicated by the arrow will be displayed.
1. Check detailed point cloud data
- Total: Total number of point cloud data in the selected area
- Dist: Measurement distance from LiDAR
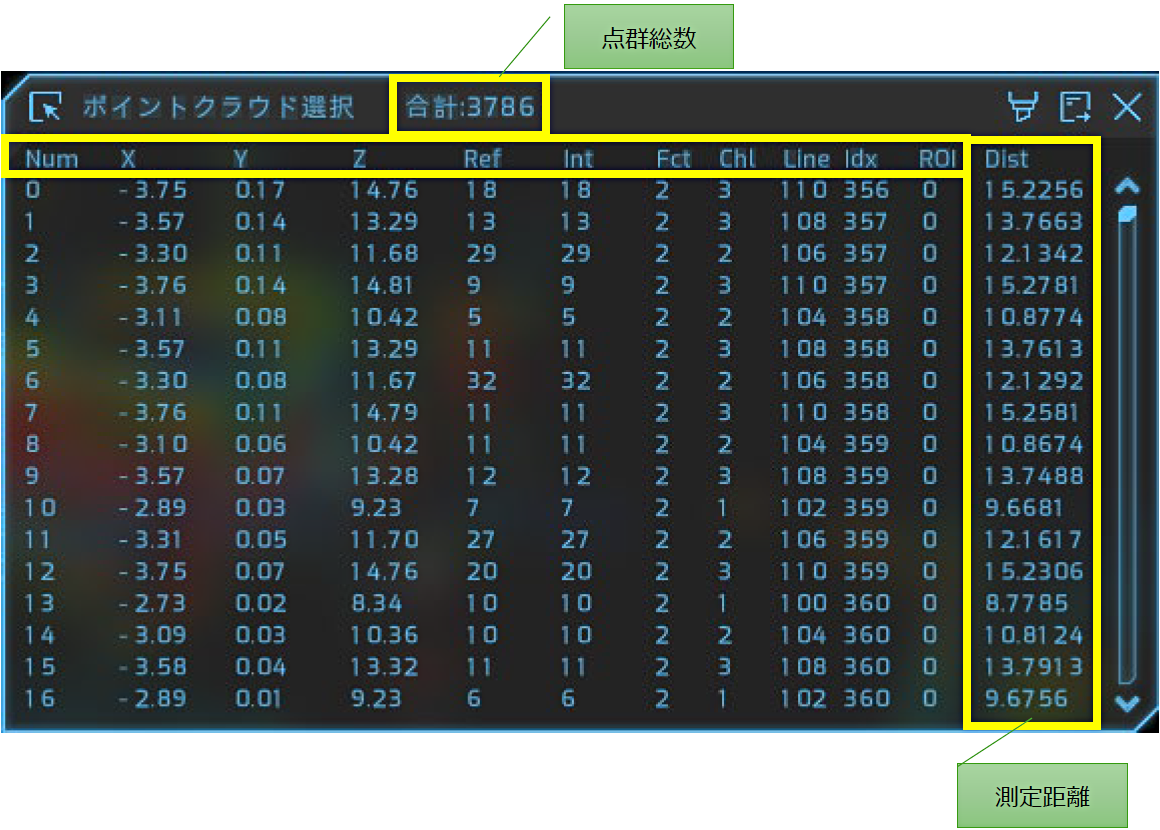
Detailed data of selected points
- Num: Serial number of each point group (example = 0 to 3804)
- X/Y/Z: Coordinates of each point group (unit: m)
- Ref: Reflection value (0 to 255)
- Int: Reflection intensity (Intensity 0~255)
- Fct: Flag/type code (discrete value)
- Chl: Channel (laser/receiving channel number)
- Line: Scan line (scanning column/line)
- Idx: Internal index
- Roi: ROI flag (Yes = 1 / No = 0)
2. Utilizing recorded point cloud data
1. Multifaceted analysis is possible using recorded data
Seyond allows you to effectively utilize recorded data acquired by LiDAR with MetaView. The various functions introduced so far can be used on recorded data as well as real-time data. Checks from various angles, which are difficult to do in real time, can be repeatedly verified and analyzed using the same data, greatly expanding the possibilities for LiDAR system development.
2. Analysis examples using video recordings
The example below shows the result of point cloud analysis performed on the car seen in the center in the previous section, viewed from directly above and then enlarged.
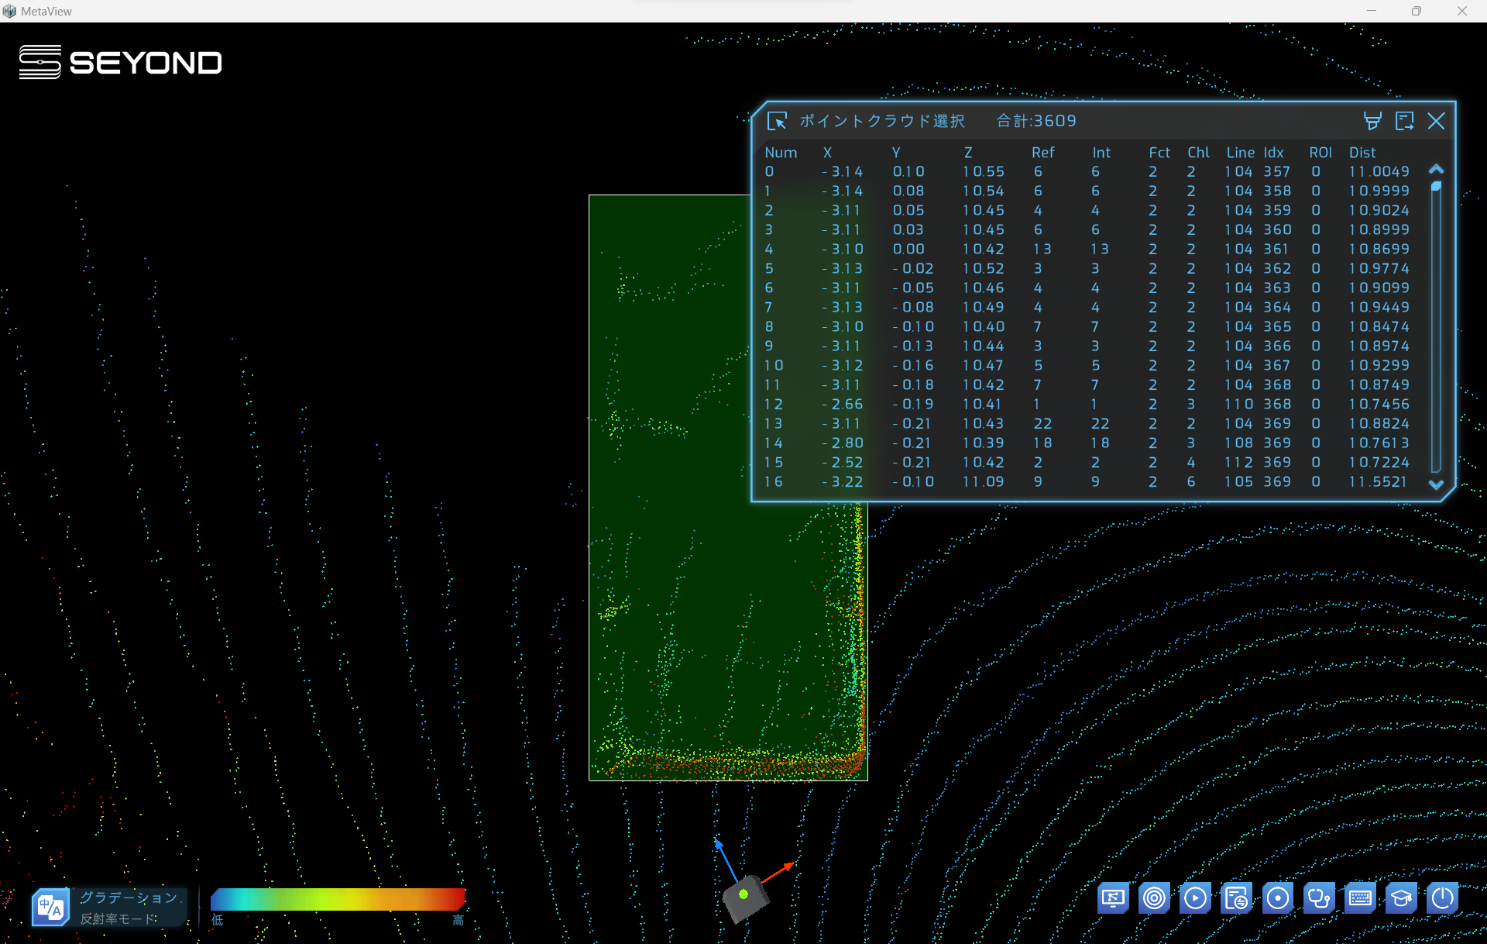
Data taken at an angle allows for more accurate confirmation of the total number of points, distance, etc.
In this way, the recorded data can be used for various analyses, allowing for time-consuming analysis.
Summary
Following on from the previous article (Basics), this article (Intermediate) introduces how to use MetaView Ver. 1.5.5, a point cloud viewer for Seyond's LiDAR products, focusing on recording and playing back point cloud data. We hope this article will be helpful when introducing the software. In the next article, we plan to provide a more in-depth (Advanced) introduction.
Seyond's LiDAR is a product that meets a variety of needs in the automotive and industrial equipment fields. If you are interested, please feel free to Inquiry Nexty Electronics.
We also offer a LiDAR rental service. Although the number of units and models is limited, please feel free to Inquiry if you have any requests.