
Increasingly, GUIs are being adopted as user interfaces for devices that are familiar to us, so that anyone can easily operate them. The tools used for GUI development are generally expensive, so many development manufacturers are hesitant to develop GUIs in-house. GUI Guider, provided free of charge by NXP, is a tool that can be used for a wide range of GUIs, from simple to practical. GUI Guider is provided free of charge for NXP evaluation boards, making it ideal for users who want to keep development costs down.
This article explains the basics of using GUI Guider. It provides step-by-step instructions so that even first-time users can get started with GUI Guider with confidence, and also introduces tips and tricks that will be useful in actual projects.
What is GUI Guider?
GUI Guider is a GUI development tool that uses the open source LVGL graphics library to rapidly develop high-quality GUI applications. GUI Guider is provided free of charge by NXP. GUI Guider employs a drag-and-drop editor, allowing you to create GUIs with many LVGL features such as widgets, animations, and styles without coding or with minimal coding.
- [NXP Official Link] GUI Guider
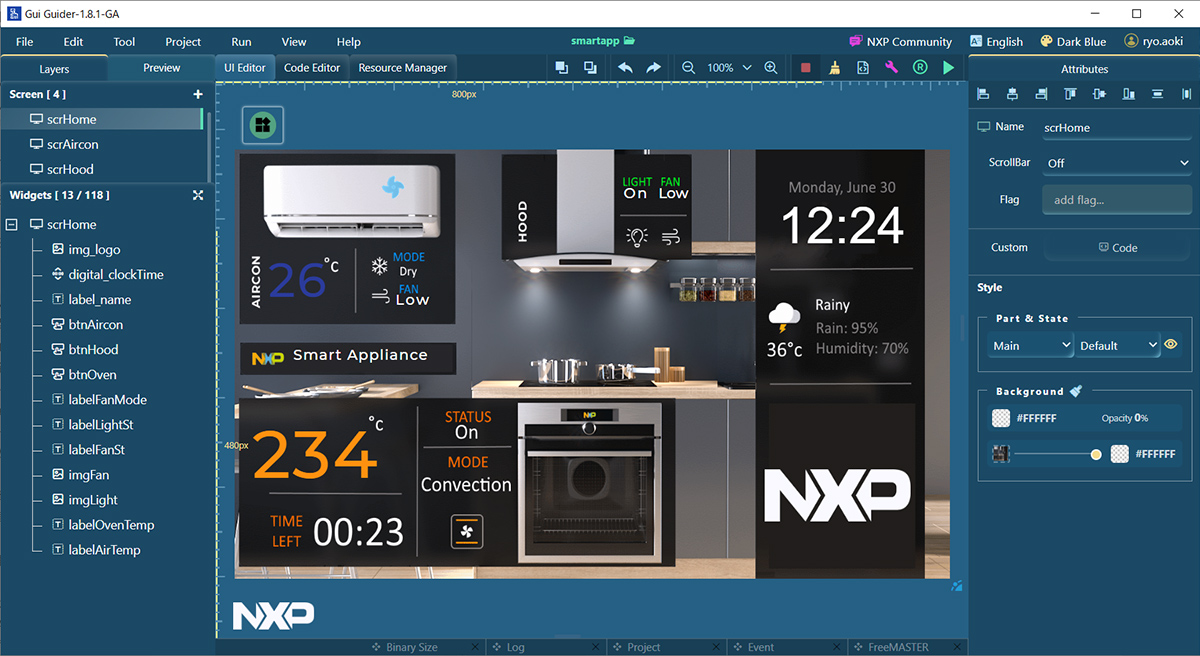
GUI Guider editor screen
With just a click of a button, you can run your application in the simulation environment or export the target project. Projects created with GUI Guider can be directly integrated into IDEs such as MCUXpresso or IAR Embedded Workbench. This allows the created GUI project to be seamlessly added to the user application development environment of the IDE, speeding up the user's development process.
GUI Guider can be downloaded free of charge by users who have registered a MY NXP account. GUI Guider project templates are available for NXP's general-purpose MCU and crossover MCU evaluation boards (EVKs). Project templates include sample projects that mimic various applications, such as a home appliance terminal that can centralize the operation of home appliances. By using the project templates for the EVKs listed below, you can immediately start developing GUI applications.
- MIMXRT1170-EVK/EVKB
- MIMXRT1060-EVK/EVKB/EVKC
- MIMXRT1050-EVKB
- MIMXRT1040-EVK
- MIMXRT1020-EVK
- MIMXRT1010-EVK
- FRDM-MCXN947
- MCX-N5XX-EVK
Many other EVKs and ICs are supported. For details, please refer to [Compatible Products] on the GUI Guider official website. If you check the [Expand all] checkbox, a list of compatible ICs will be displayed. Please check the EVK on each product page.
- [NXP Official Link Compatible Products] GUI Guider
Install GUI Guider and run the sample project on the EVK
In this column, we will use GUI Guider.
- Installing GUI Guider
- Run the sample project on your board
- Creating a GUI application from a new project
I will explain in the following order.
This article does not explain how to install IDEs such as MCUXpressoIDE or SDKs, so if you need them, please check the related sites.
Tool Version and EVK
The versions of the tools used in this article are as follows:
- GUI Guider 1.8.1
- MCUXpresso IDE v11.9.0
- MCUXpresso SDK for MIMXRT1170-EVKB 2.16.000
- LVGL v8.3.10
The versions of the tools used in this article are as follows:
- MIMXRT1170-EVKB
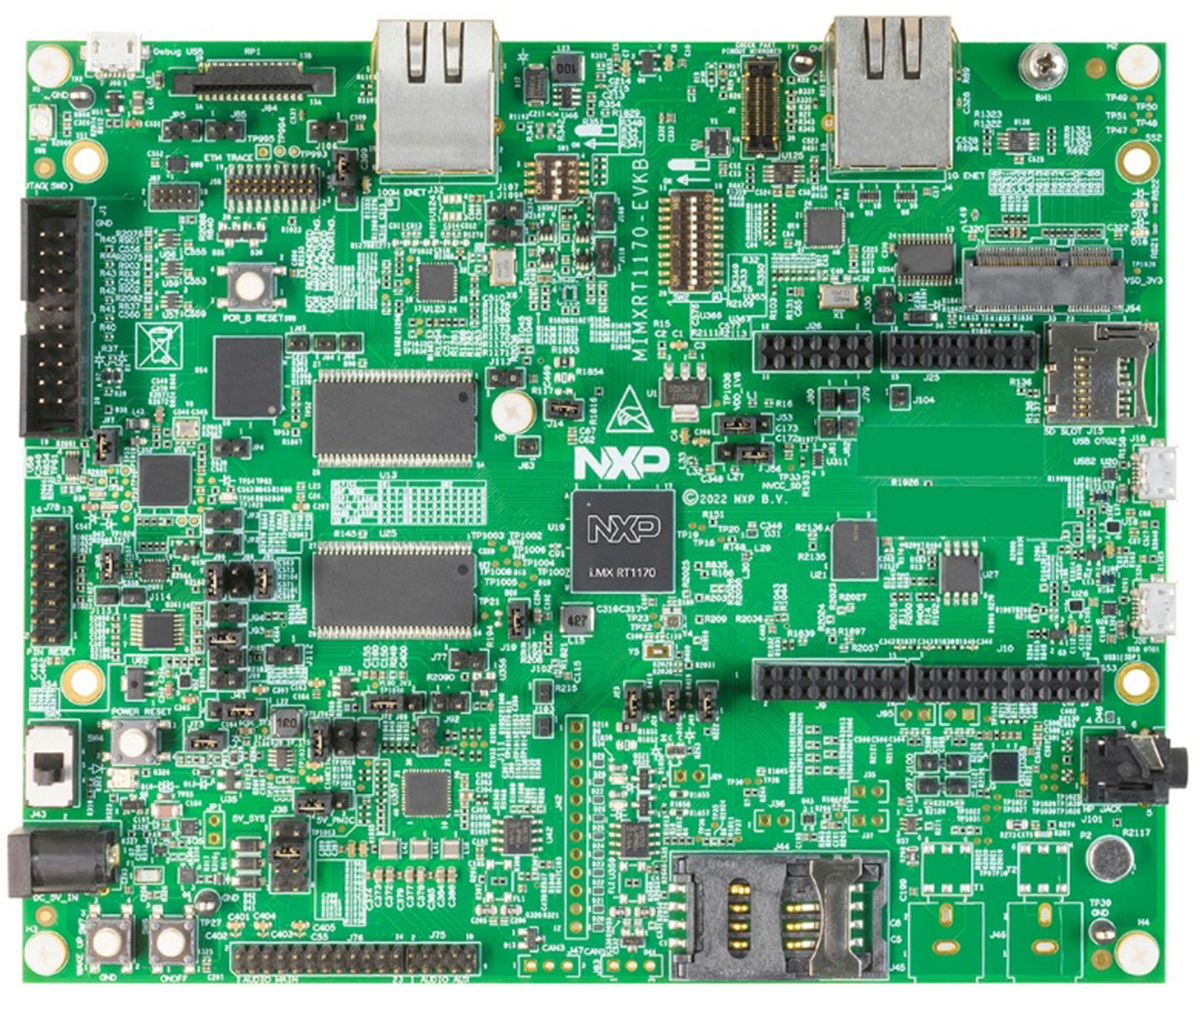
MIMXRT1170-EVKB
- [NXP Official Link] GUI Guider
Installing GUI Guider
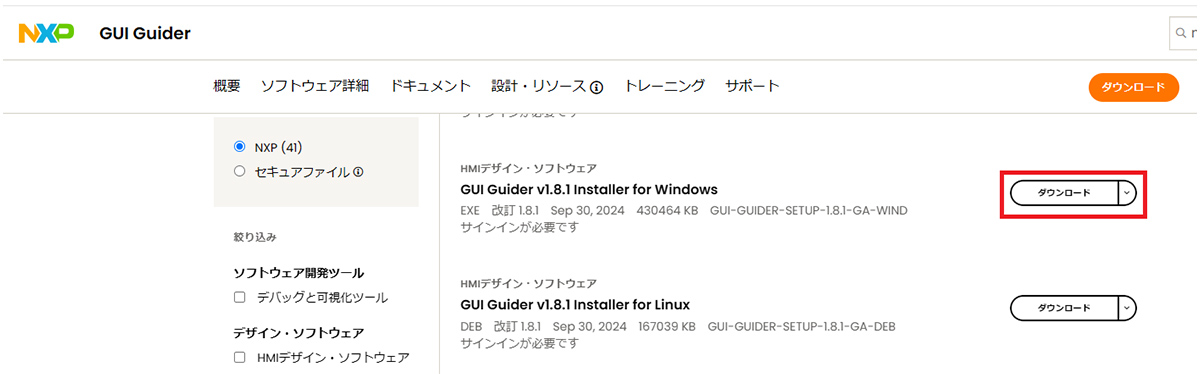
To download the GUI Guider, you must log in to My NXP. If you have not registered for My NXP yet, please register on the NXP official website.
- [NXP Official Link] My NXP Registration
From the GUI Guider page, click [Download] and download the installer that corresponds to your OS. In the example below, the installer for Windows is selected.
- [NXP Official Link] GUI Guider
Run the downloaded installer and install GUI Guider.
Importing the sample project
With GUI Guider, you can easily check GUI operation by simply importing a sample project that is already prepared. This section explains the procedure from importing the sample project to running it on the EVK using GUI Guider, which you just installed.
1. Start GUI Guider and select [Create a new project].
![「1.GUI Guiderを起動し、[Create a new project]を選択します。」:イメージ](https://enexty-assets-public.dxp.nexty-ele.com/guiguider/01/guiguider_01_assets05.jpg)
2. Select the LVGL version.
![「2.LVGLバージョンを選択します。]を選択します。」:イメージ](https://enexty-assets-public.dxp.nexty-ele.com/guiguider/01/guiguider_01_assets06.jpg)
- *LVGL is an abbreviation for Light and Versatile Embedded Graphics Library, an open source graphics library. GUI Guider draws by calling the LVGL API. For details, please refer to the following page.
- [NXP Official Link] LVGL Open-Source Graphics Library
The LVGL API is available on the LVGL website. Please refer to that as well.
- [NXP Official Link] LVGL
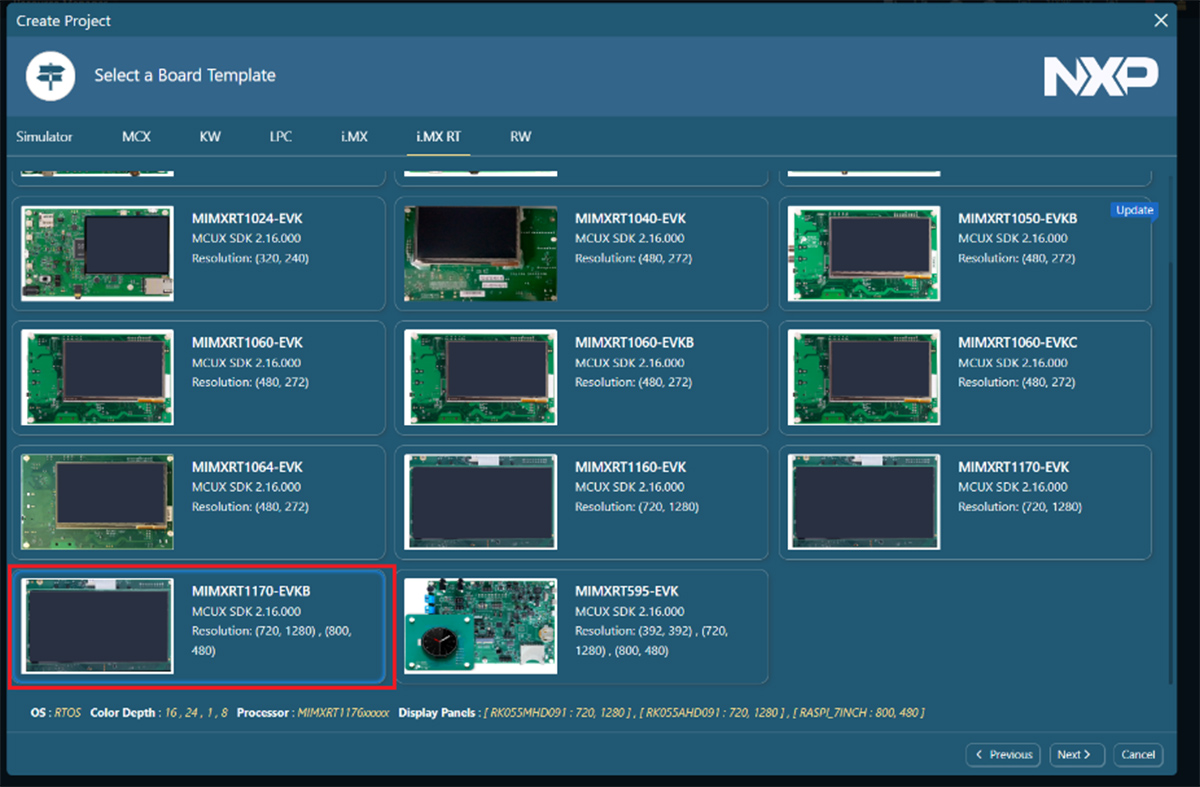
3. Select the EVK you want to use.
This time, we will use MIMXRT1170-EVKB for explanation. Please select the one that matches the EVK you are actually using.
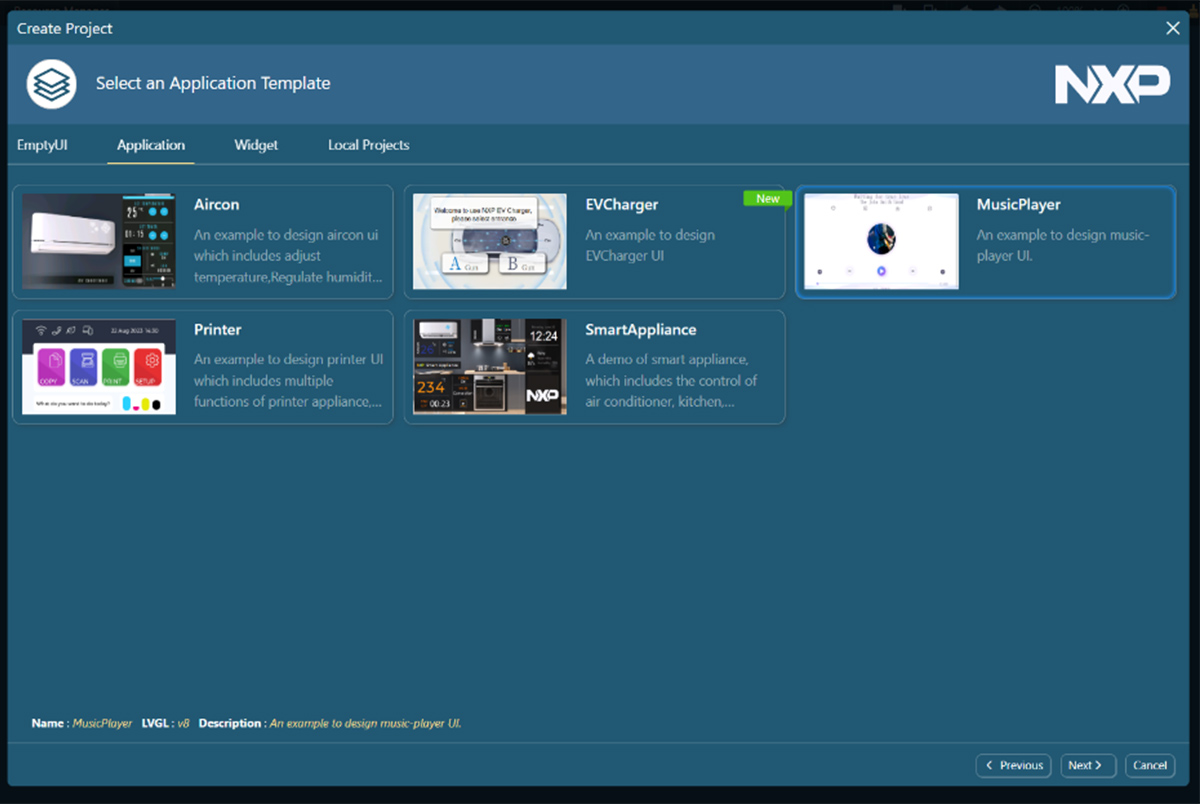
4. Select the sample project you want to import.
You can switch between EmptyUI/Application/Widget/Local Projects using the tabs.
5. Enter any Project Name in [Project Name].
6. Select the LCD panel you want to use.
You can choose from multiple preset LCD panels that are compatible with the selected EVK.
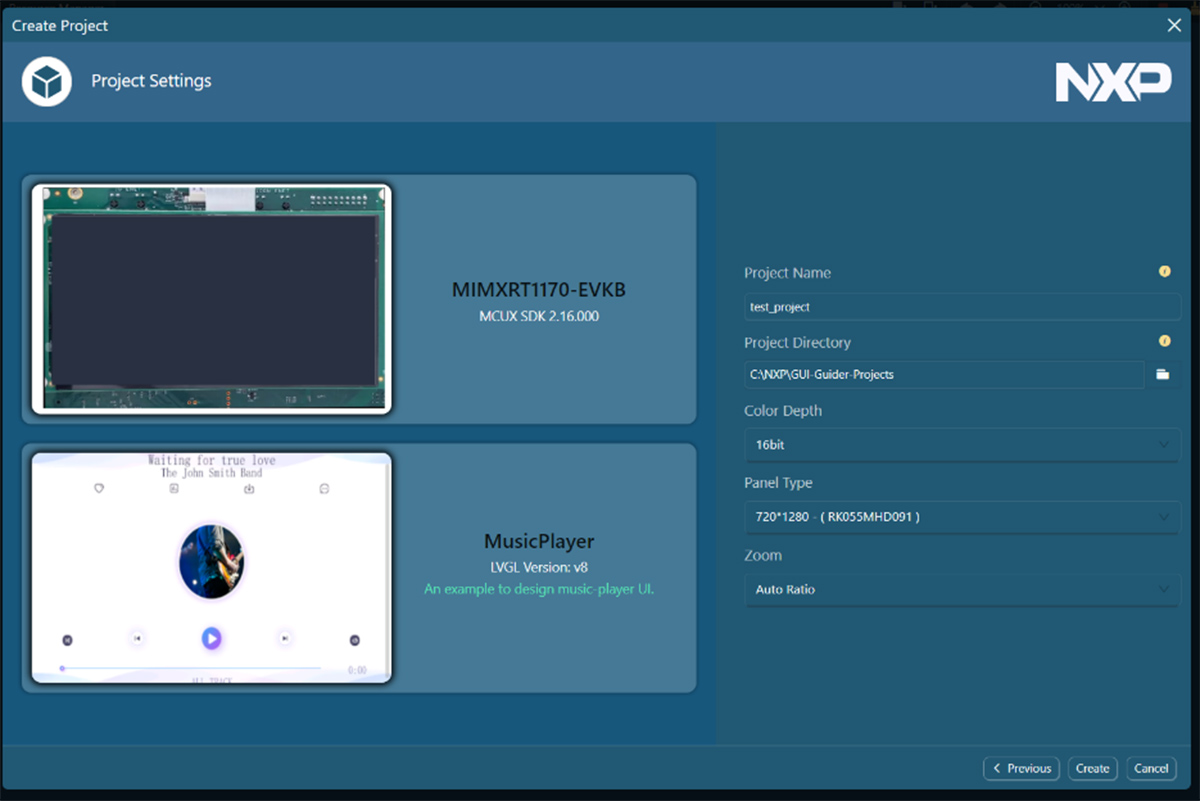
7. Finally, click the [Create] button to create the project with the selected conditions.
- *When you press the Create button to create a project, the source code will be downloaded from the network. Therefore, the PC using GUI Guider must be connected to the Internet. If you are unable to connect due to security settings on an internal company network, project creation may fail. In such cases, please check your network connection environment, such as proxy settings.
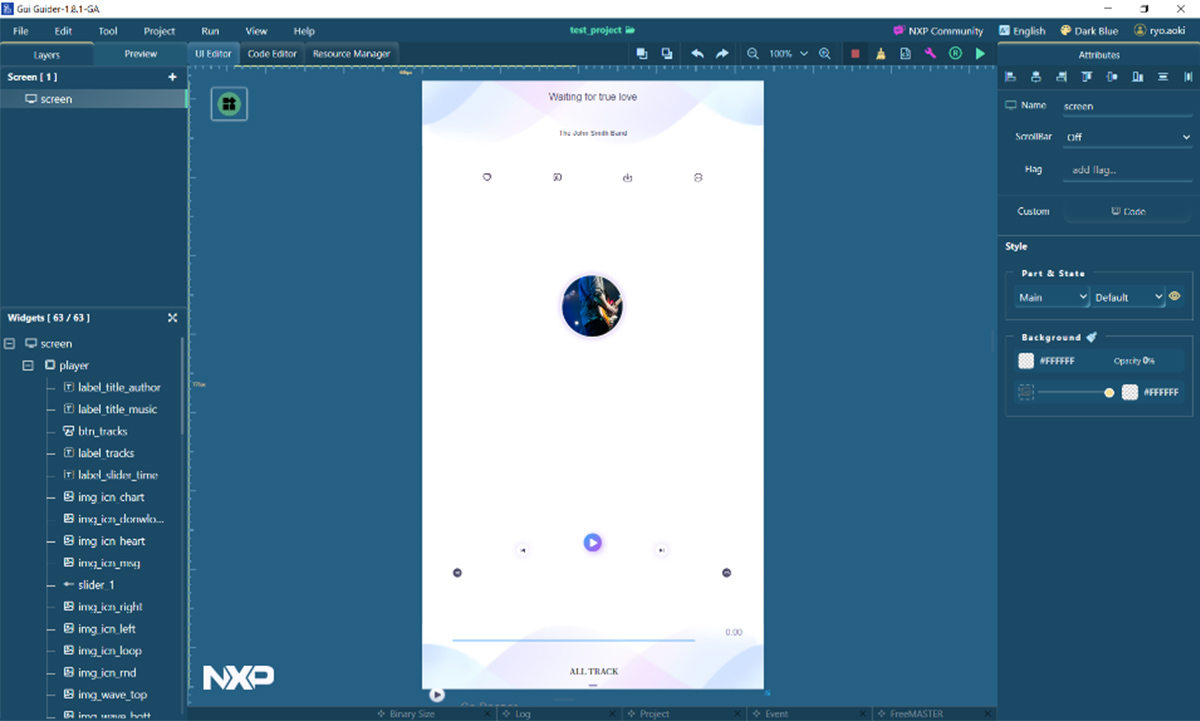
8. When you see the screen below, the import is complete.
From here you can actually modify and run the GUI.
In the next chapter, we will check the operation using a simulation. If you want to check the operation on an actual device, please refer to "Uploading to the EVK and Checking Operation."
8. When you see the screen below, the import is complete.
From here you can actually modify and run the GUI.
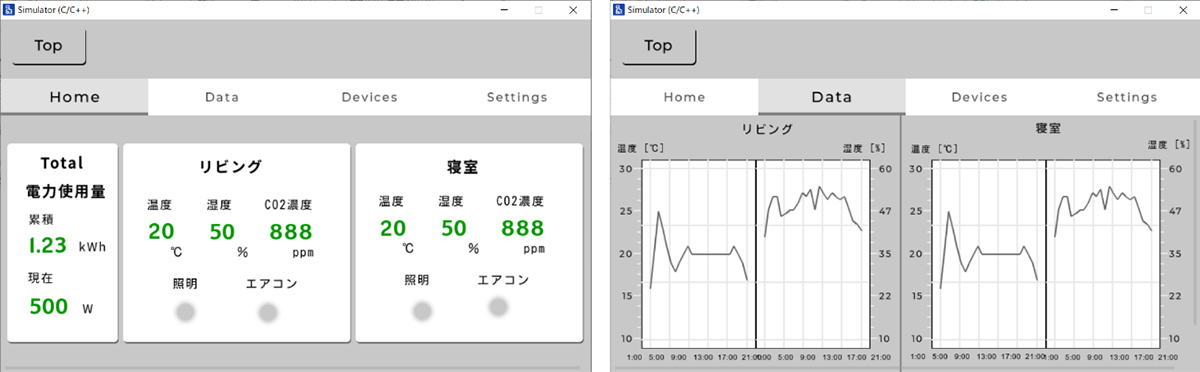
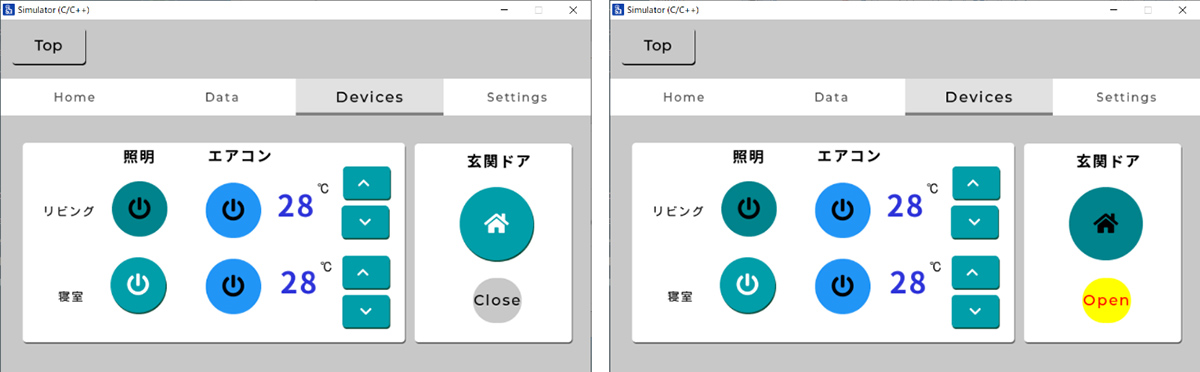
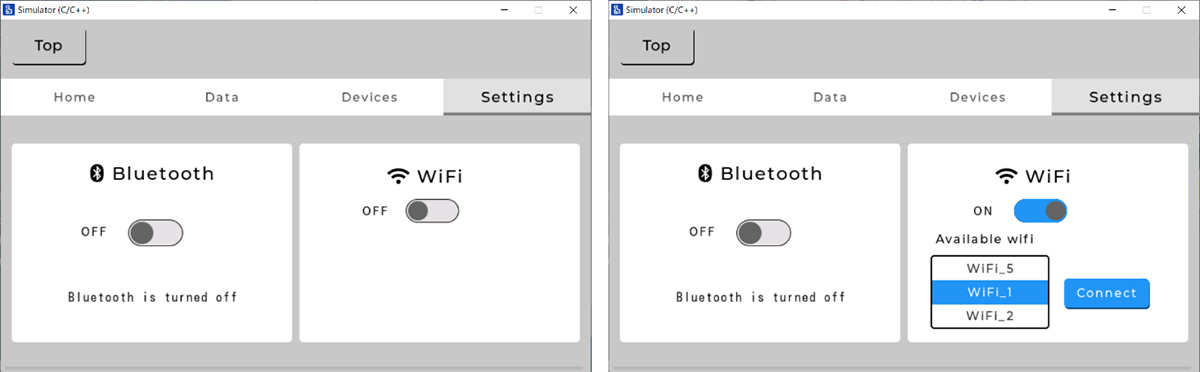
Operation check by simulation
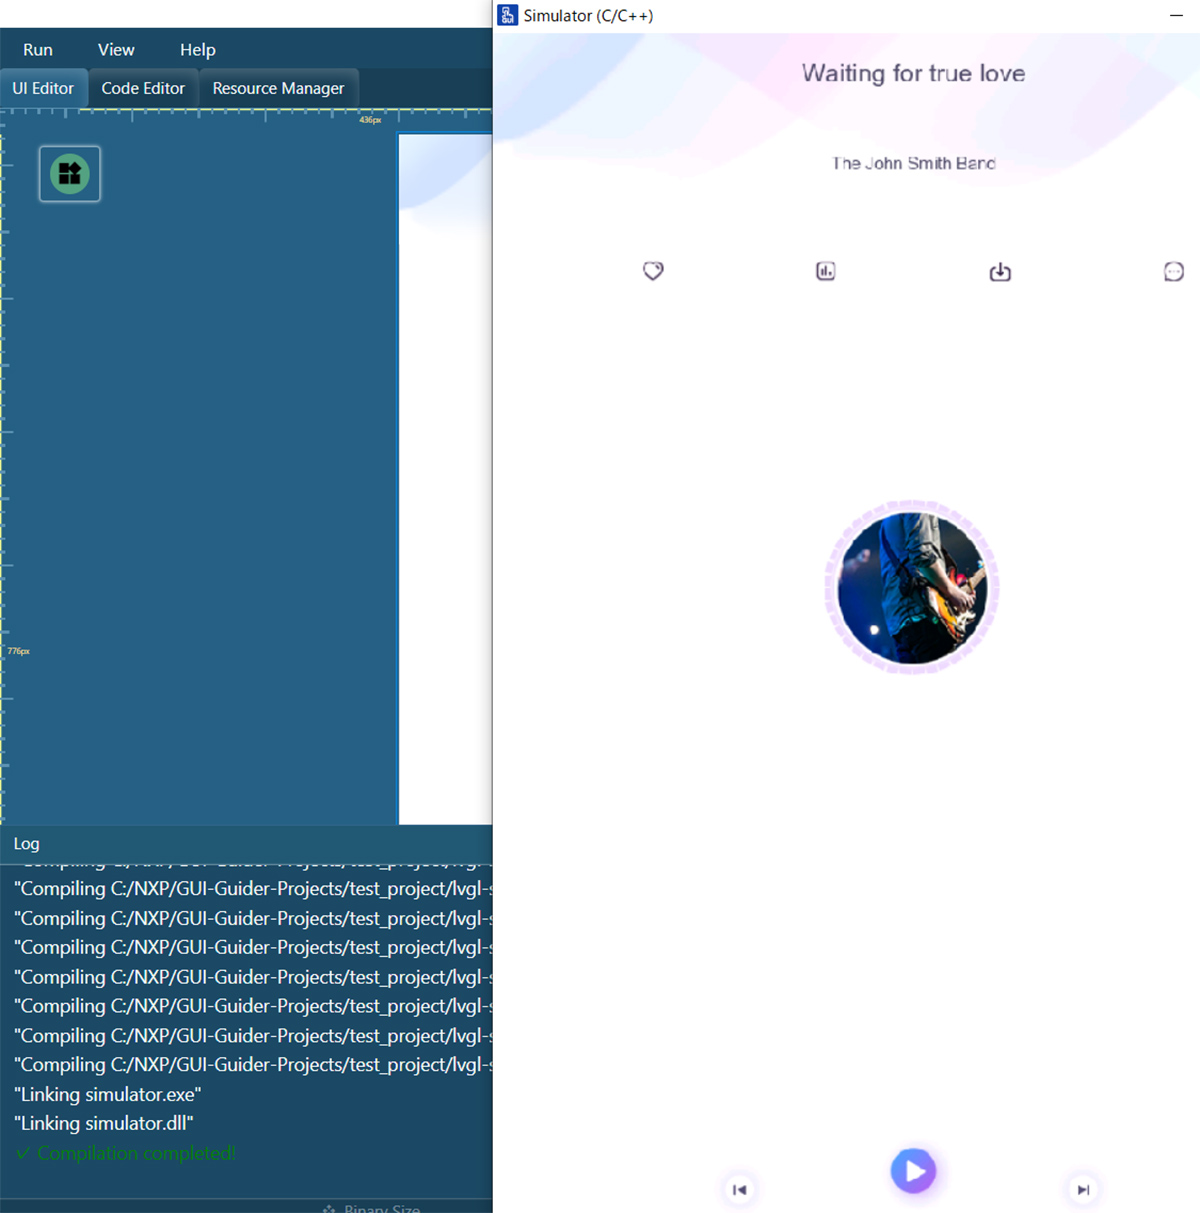
With GUI Guider, you can check GUI operation in the simulator without actually writing a program to the IC. After importing the project or completing the UI creation, perform the following operations.
1. Click the [▶] button (Generate Code & Build & Run) in the upper right corner and select [C] under Simulator.
![「1.右上の[▶]ボタン(Generate Code & Build & Run)より、Simulatorの下の[C]を選択します。」:イメージ](https://enexty-assets-public.dxp.nexty-ele.com/guiguider/01/guiguider_01_assets11.jpg)
2. Code generation and building will begin, and once complete the simulator will launch in a separate window.
You can also check screen touch operations on the simulator.
Write to EVK and check operation
GUI Guider allows you to write software to the EVK and check the operation of the GUI without using any other IDE. Previous versions of GUI Guider required you to import source code into the MCUXpresso SDK to build and write, but with the upgrade, you can now build and write with GUI Guider.
1. After importing the project in GUI Guider or completing the UI creation, connect the EVK (in this case MIMXRT1170-EVKB) to your PC with a USB cable and power on the EVK.
2. Click the [▶] button in the upper right corner of the screen and select [MCUXpresso] under [Target].
![「2.画面右上の[▶]ボタンから[Target]で [MCUXpresso]を選択します。」:イメージ](https://enexty-assets-public.dxp.nexty-ele.com/guiguider/01/guiguider_01_assets14.jpg)
3. The process from building the project to writing the program to the EVK is executed automatically.
4. After programming is complete, the EVK will automatically boot into the programmed project.

Creating a GUI application from scratch
This article explains how to place a button widget on the EmptyUI template in GUI Guider, assign an action to be performed when the button is clicked, and make it work.
Example of GUI creation from EmptyUI template
1. Proceed to the project template selection screen by following the steps explained in Importing a sample project."
2. Select [EmptyUI]. This will create an empty state with nothing placed. From here, you can place components to create the UI.

![「2.[EmptyUI]を選択します。何も配置されていない空の状態となります。ここから部品を配置してUIを作成していきます。」:イメージ](https://enexty-assets-public.dxp.nexty-ele.com/guiguider/01/guiguider_01_assets18.jpg)
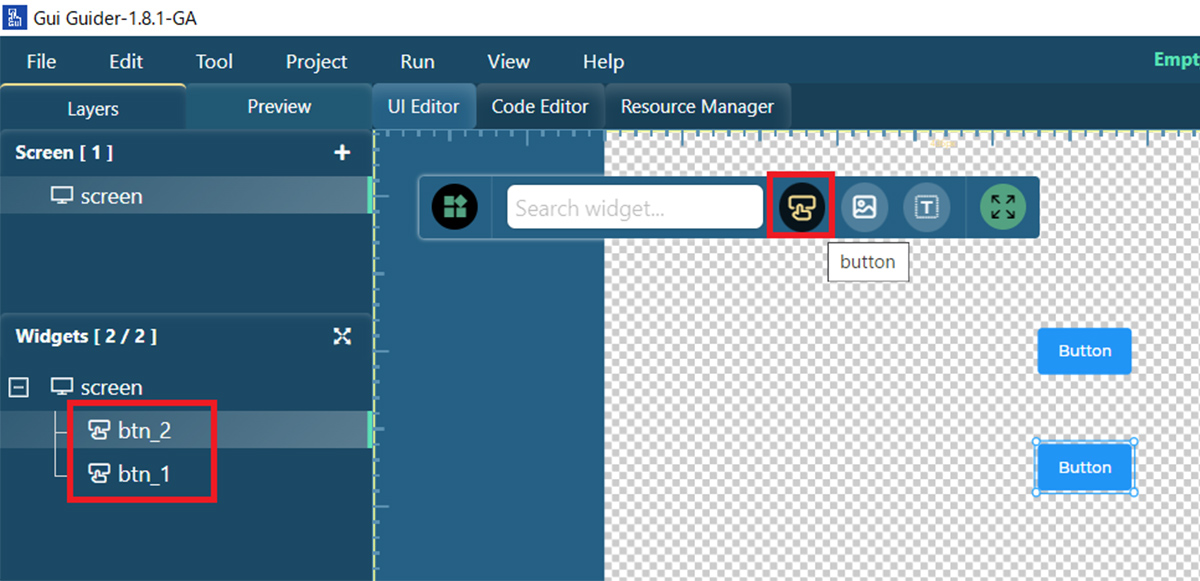
3. Place parts using the icon in the top left of the field.
Here we will place two buttons.
Placed components will be displayed under Widgets in the left pane.
4. You can place a text box using the [Label] button.
You can change the text content, size, etc. from [Font] in the right pane.
![「4.[Label]ボタンからはテキストボックスを配置できます。」:イメージ](https://enexty-assets-public.dxp.nexty-ele.com/guiguider/01/guiguider_01_assets20.jpg)
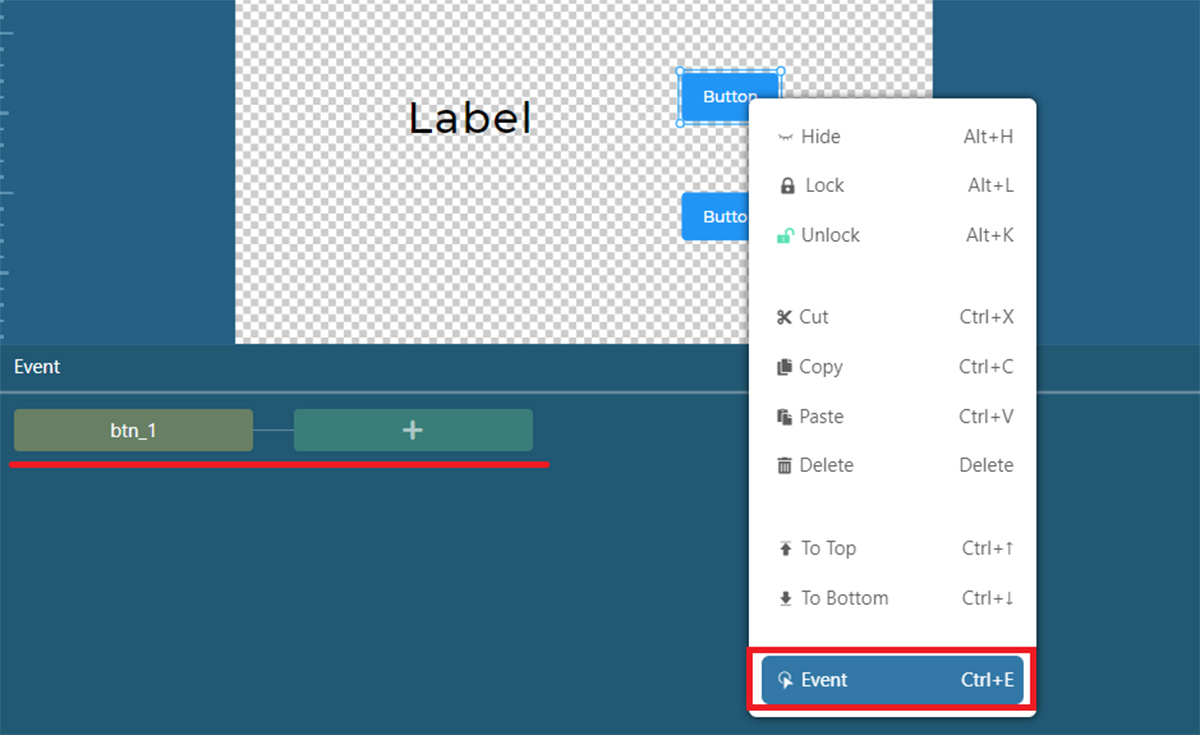
5. Right-click the component and select Event to display the event setting screen in the lower pane.
No events are assigned to a button immediately after it is placed.
6. Let's actually assign an event to the button.
You can set events by clicking the [+] button under Event.
First, set the trigger for the event to occur. To set an event for when the button is pressed, select [Clicked] and click [Confirm] to confirm.
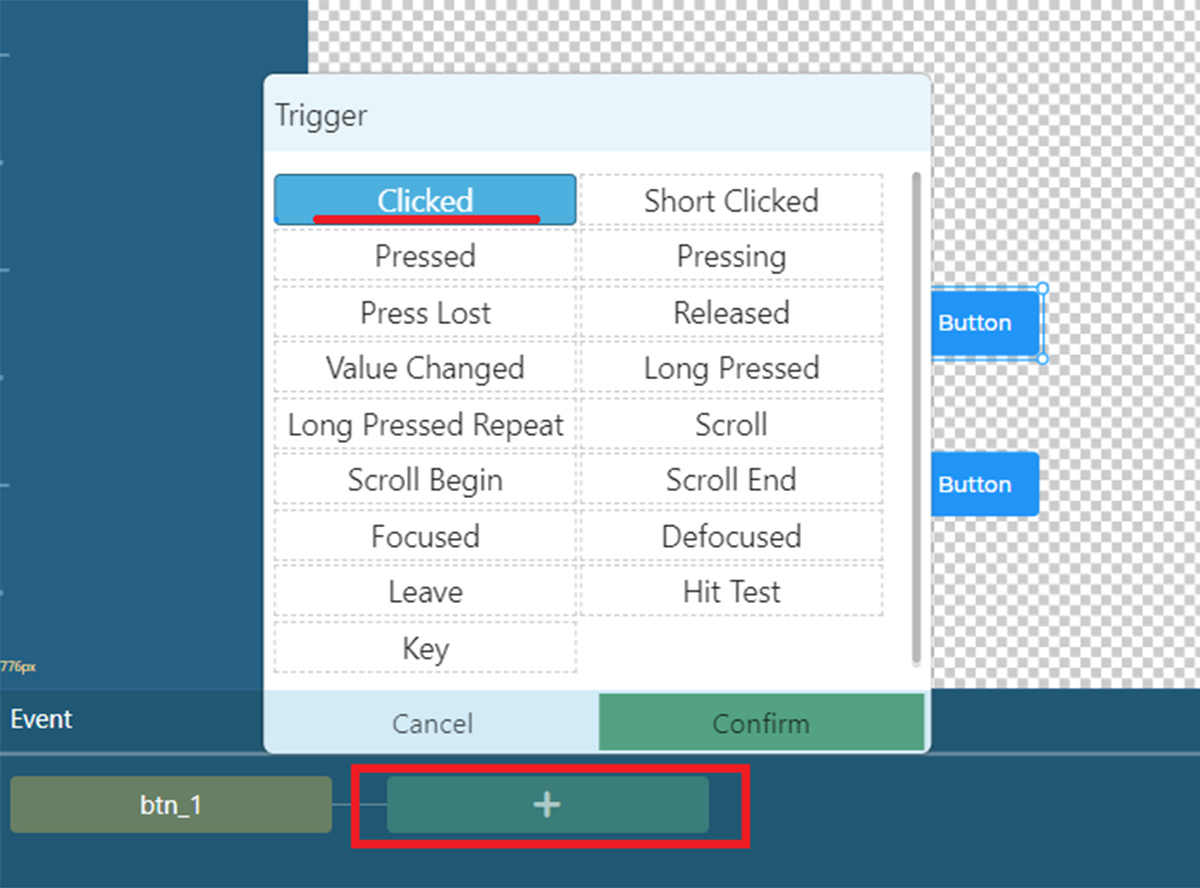
7. After selecting [Clicked] as the event occurrence trigger, select the target for which the event will occur.
Since we want to change the content of the Label this time, click the [+] button and select [label_1] as the target.
![「7.イベント発生トリガーとして[Clicked]を選択したら、イベントを行う対象を選択します。」:イメージ](https://enexty-assets-public.dxp.nexty-ele.com/guiguider/01/guiguider_01_assets23.jpg)
8. Now that you've set the target of your event, it's time to choose the content of your event.
You can set various events such as changing the font, changing the coordinates, changing the background color, etc. This time, we will change the text content, so select [Text] from the [+] button.
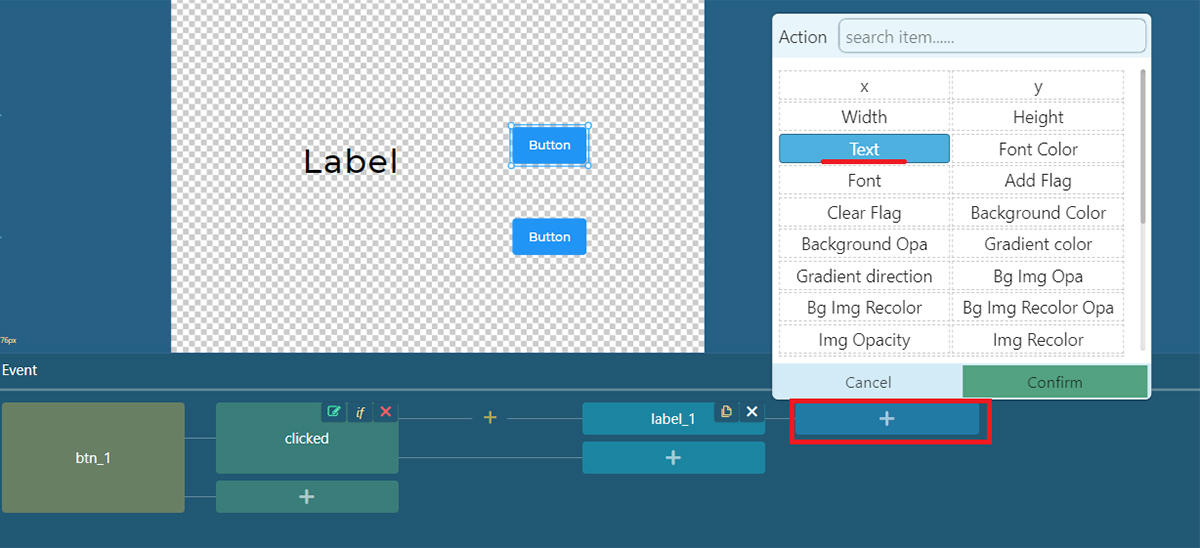
9. A box for changing the text content will be created in the event column.
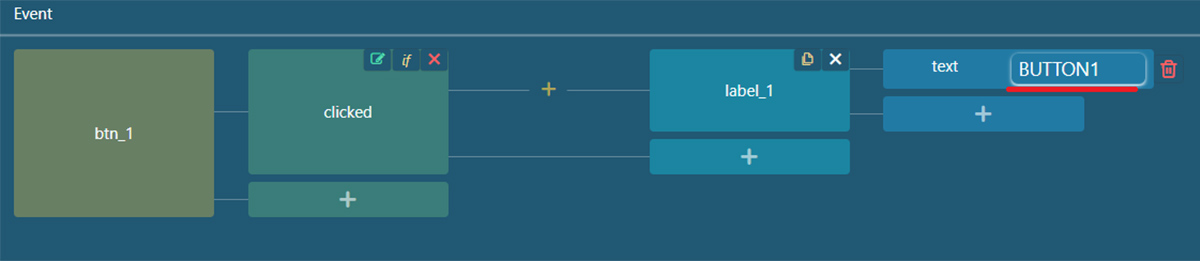
Here, we entered "BUTTON1" as the change we want to make.
Now, we have created an event thatchanges the content of label_1 to "BUTTON1" when the up button is pressed.
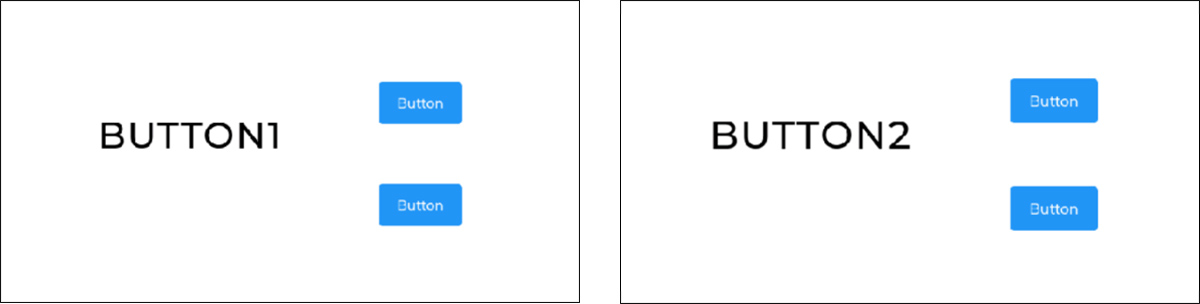
10. In the same way, set an event for the down button so that when it is pressed, the content of label_1 will change to "BUTTON2".

11. Check the operation in the simulator.
You can see that when you press the upper button (btn_1), the text changes to BUTTON1,
and when you press the lower button (btn_2), the text changes to BUTTON2.
In this way, you can create a rich UI by setting various events for buttons, images, text, backgrounds, etc.
Importing a project to MCUXpresso
The source code of a project created with GUI Guider cannot be edited directly in GUI Guider. If you import a project created with GUI Guider into MCUXpresso, you will be able to edit the source code in MCUXpresso. By exporting a project for MCUXpresso/IAR/Keil IDEs from GUI Guider and importing it into the IDE, you can develop applications using GUI screens in the IDE you are familiar with.
This section explains how to import a project into MCUXpresso.
1. First, in the project you created, select [C] from the [Generate Code] icon in the upper right corner to output the source code.
![「1.まず、作成したプロジェクト上で右上の[GenerateCode]アイコンから[C]を選択し、ソースコードを出力します。」:イメージ](https://enexty-assets-public.dxp.nexty-ele.com/guiguider/01/guiguider_01_assets28.jpg)
2. Select [MCUXpresso] from the [Build] icon and build once on the GUI Guider.
This completes the export process on the GUI Guider side.
![「2.[Build]アイコンから[MCUXpresso]を選択し、一度GUI Guider上でビルドを行います。」:イメージ](https://enexty-assets-public.dxp.nexty-ele.com/guiguider/01/guiguider_01_assets29.jpg)
3. Check the project directory created by GUI Guider.
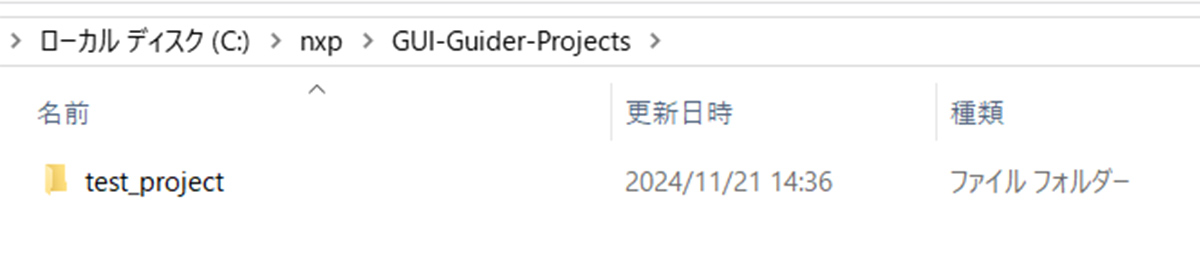
By default the project will be created in C:\nxp\GUI-Guider-Projects.
4. Select [Import project(s) from file system] in the bottom left pane of MCUXpresso.
![「4.MCUXpressoの左下ペイン[Import project(s) from file system]を選択します。」:イメージ](https://enexty-assets-public.dxp.nexty-ele.com/guiguider/01/guiguider_01_assets31.jpg)
5. Select [Browse] for [Project directory (unpacked)], specify the directory of the GUI Guider creation project you confirmed earlier, and select [Next].
![「5.[Project directory(unpacked)]の[Browse]を選択し、先程確認したGUI Guider作成プロジェクトのディレクトリを指定し、[Next]を選択します。」:イメージ](https://enexty-assets-public.dxp.nexty-ele.com/guiguider/01/guiguider_01_assets32.jpg)
6. The project in the directory is recognized, make sure the checkbox is checked, and then select [Finish].
![「6.ディレクトリ内のプロジェクトが認識され、チェックボックスにチェックがついていることを確認して[Finish]を選択します。」:イメージ](https://enexty-assets-public.dxp.nexty-ele.com/guiguider/01/guiguider_01_assets33.jpg)
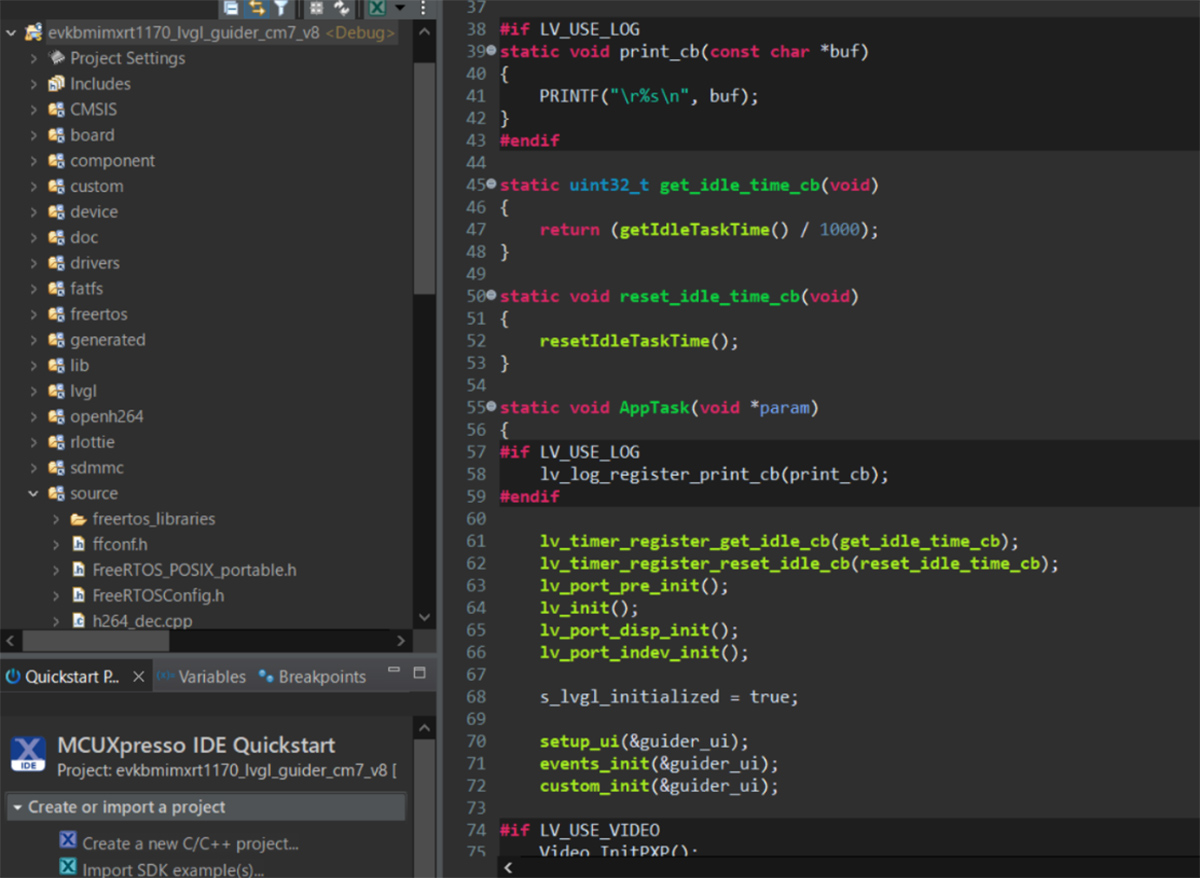
7. The project import is now complete.
From now on, you can view, modify, build, write, etc. the source code on MCUXpresso.
GUI Example
So far, we have explained how you can use GUI Guider to create rich GUIs.
Here we will introduce some examples of GUIs that can be created with GUI Guider.
- Tab switching display
Using the Tabview function, you can create a GUI that displays tabs.
- Tab switching displayPerform multiple actions
By assigning the target of the action that occurs when the button is clicked to another component in addition to the button itself, you can perform multiple actions with a single click.
- Show/Hide toggle
By setting [isVisible] as the action for a target, you can toggle the visibility of the target by turning the slide button on and off.
As you can see, there are a wide variety of objects that can be placed, targets for actions, and action contents. By making full use of these, you can create a richer GUI. For information on the functions of each part, please check the official documentation and the LVGL web page.
Conclusion
This column explained how to use GUI Guider. GUI development requires combining multiple components to work well together, which can make development a high hurdle, but with GUI Guider you can easily create rich GUIs free of charge. For detailed usage information, see the user manual on the GUI Guider official website in the related links, or the LVGL official website.
Related Info
Inquiry
Link to Related Technical Columns
Related Product Information

An In-Depth Look at the Features of NXP's Automotive CAN/LIN Transceiver Products
This article explains the features of NXP’s automotive CAN/LIN transceivers, designed to withstand harsh in-vehicle conditions, for ECU developers looking for reliable in-car network products.
- NXP Semiconductors NV
- NEXT Mobility
- ICT and Industrial

Introduction to Edge AI Solutions with NXP's NPU-equipped i.MX/MCX
This article explains the rapidly growing edge AI with real device examples and introduces NXP’s processors and microcontrollers equipped with NPUs.
- NXP Semiconductors NV
- NEXT Mobility
- ICT and Industrial
- Smart Factories and Robotics

A thorough explanation of the appeal of NXP's automotive PMICs (Page 2/2) | An explanation of NXP's automotive PMIC portfolio and the features of its representative products.
This article explains the necessity of PMICs in automotive ECUs, as well as the features, advantages, and portfolio of NXP's automotive PMICs. This first part focuses on the automotive PMIC portfolio and the characteristics of its representative products.
- NXP Semiconductors NV
- NEXT Mobility

Introducing NXP's CAN TRANSCEIVER products with signal improvement (SIC)
NXP's SIC-equipped CAN TRANSCEIVER actively suppresses ringing on the transmitting side, stabilizing high-speed CANFD communications. It is software and pin compatible, allowing it to be replaced with existing designs, and is compliant with automotive standards.
- NXP Semiconductors NV
- NEXT Mobility

An In-Depth Look at the Advantages of NXP's Automotive Microcontroller S12 MagniV
NXP’s integrated microcontroller, S12 MagniV, helps miniaturize ECUs and shorten development time, contributing to the electrification of automotive systems. This article explains its features and benefits.
- NXP Semiconductors NV
- NEXT Mobility
- ICT and Industrial

Introduction to NXP's Automotive Millimeter-Wave Radar Products
This article provides an overview of automotive millimeter-wave radar, a key sensor in advanced driver-assistance systems (ADAS), and introduces NXP’s leading radar product family driving the market.
- NXP Semiconductors NV
- NEXT Mobility
- ICT and Industrial
- Smart Factories and Robotics