1. Introduction
The Arduino Uno Q has two components: a processor that runs Linux and a microcontroller that is programmed using Arduino sketches.
When developing using Arduino App Lab, the processor-side program is written in Python, and the unique features of the Arduino Uno Q are accessed via a library called Brick(s).
In the sample programs for these Bricks, arguments are sometimes omitted, making it difficult to understand the customization options offered by each Brick.
So this time, the sampleDetect Objects on CameraUsing this as an example, we will review how to use Brick and confirm that the behavior actually changes.
Equipment to be used
The following equipment is required to perform the procedure described here.
The equipment used to create this article is indicated in parentheses, but other equivalent equipment will work just fine.
- 2. USB camera (Logitech C270)
- 3. Type-C USB hub (Elecom DST-W09)* It has a Type-A TERMINALS for connecting a USB camera.
* Accepts PD power supply (27W or higher) - 4. PD-compatible USB Type-C AC ADAPTERS (Elecom ACDC-PD8445BK)* 45W or higher is recommended.
2. Try running it as is.
First, what is preparedDetect Objects on CameraLet's try running it as is.
This sample requires a USB camera to be connected, so please run your Arduino Uno Q in SBC mode (configuration shown in Figure 1).
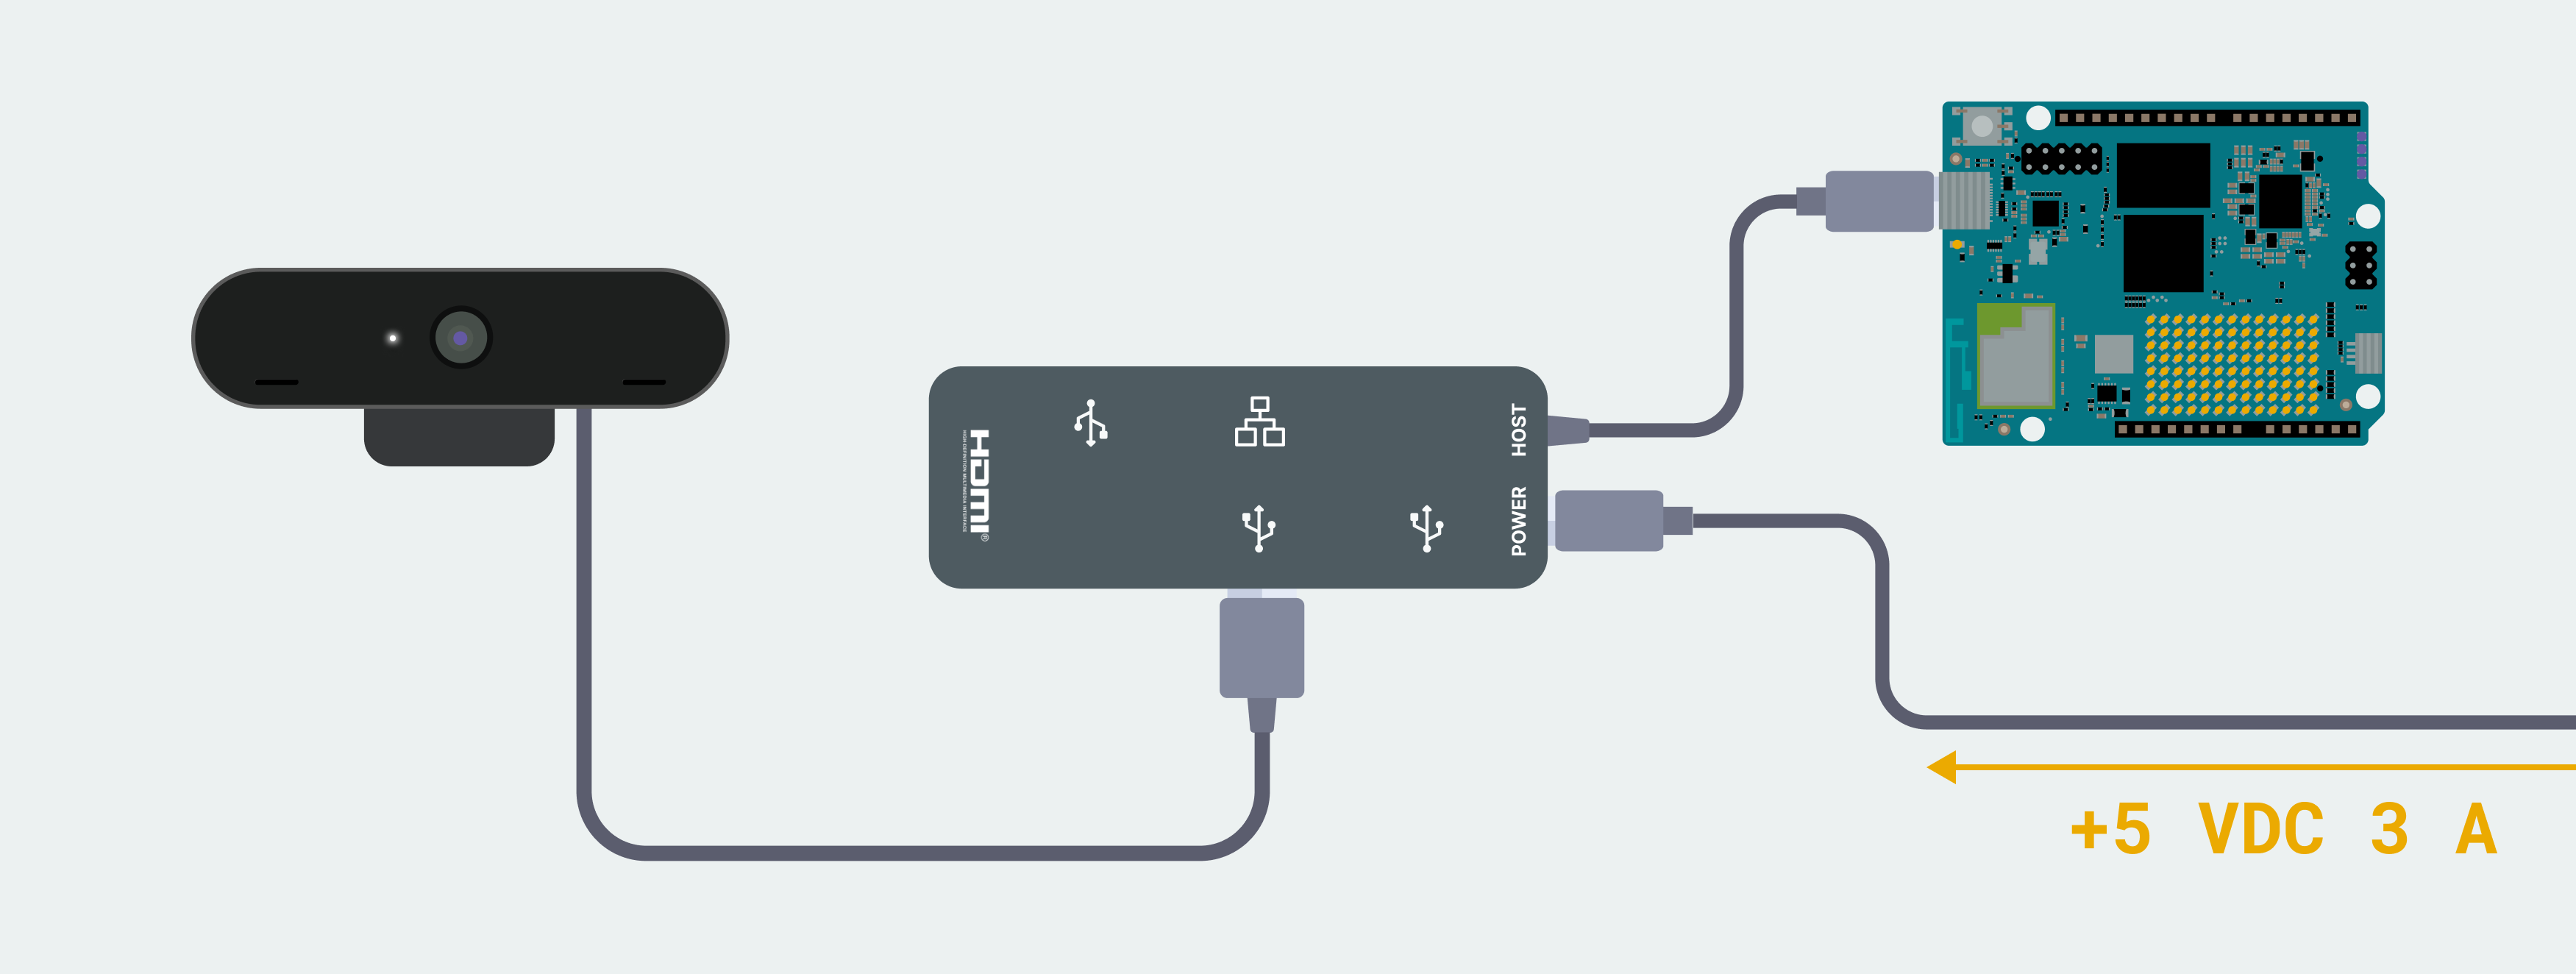
Figure 1: Arduino Uno Q SBC mode configuration (from Detect Objects on Camera)
If you have connected DISPLAY to your Arduino Uno Q, the Arduino Uno Q's browser will open and you can view the screen.
If you are not connected, you can check from a browser on a PC connected to the same network. Please Access the following URL.
http://unoq.local:8000You should see a screen like this.
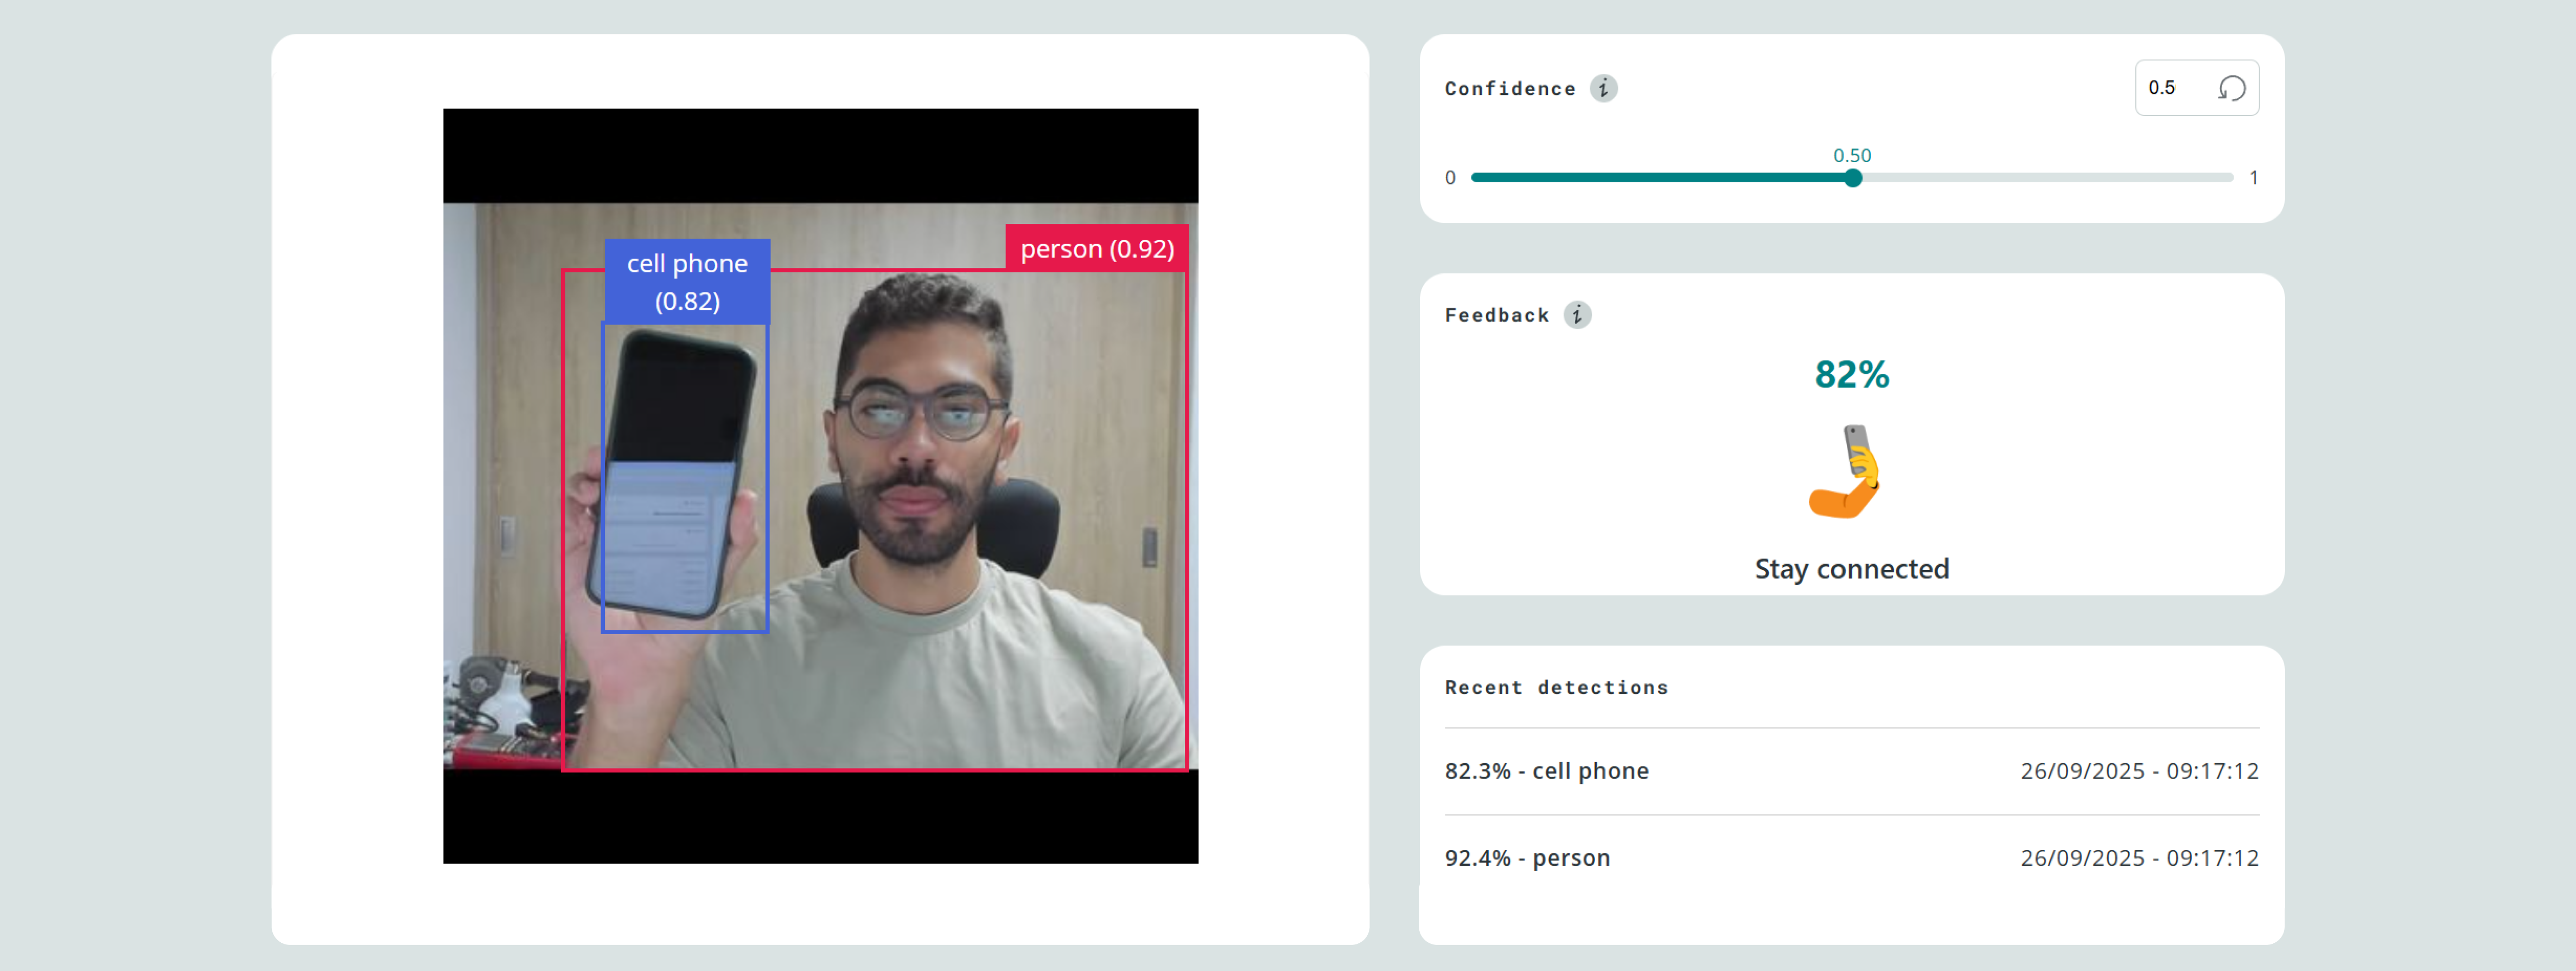
Figure 2: Initial display of the sample application (from Detect Objects on Camera)
It's immediately obvious that FRAMES rate is low.
If you are running from Arduino App Lab, there is a button labeled "Python" below the area where the opened file is displayed.
Pressing this button will allow you to view the logs.
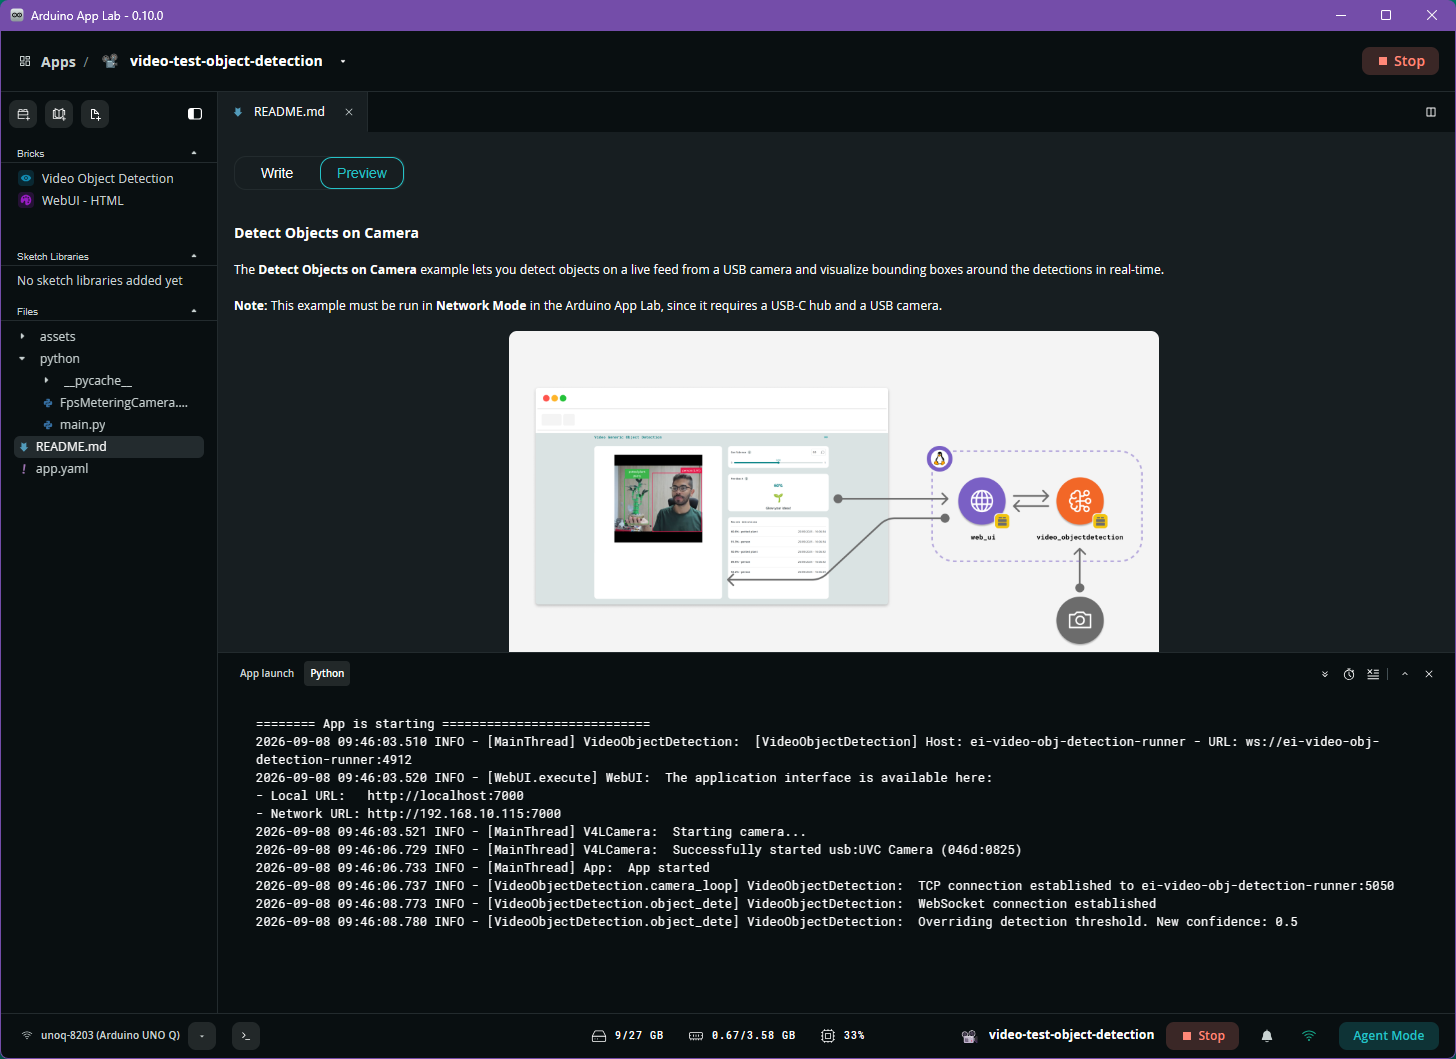
Figure 3: Arduino App Lab Log
We will now check the set FRAMES rate. Finally, we will add a measurement code to confirm the actual FRAMES rate.
3. Check the specifications of Brick.
Check the documentation for VideoObjectDetection Brick.
Now let's take a look at the specifications of Brick.
First, it is called using the following code.VideoObjectDetectionLet's start by investigating from there.
ui = WebUI()
detection_stream = VideoObjectDetection(confidence=0.5, debounce_sec=0.0)
You can find the Brick API in the Arduino App Lab. After getting your Arduino Uno Q to recognize the board, you can check it using the following steps.
- 1. Select Bricks under Bricks Manager in the left pane.
- 2. Select the desired Brick, in this case VideoObjectDetection.
- 3. Select API Documentation from the options at the top.
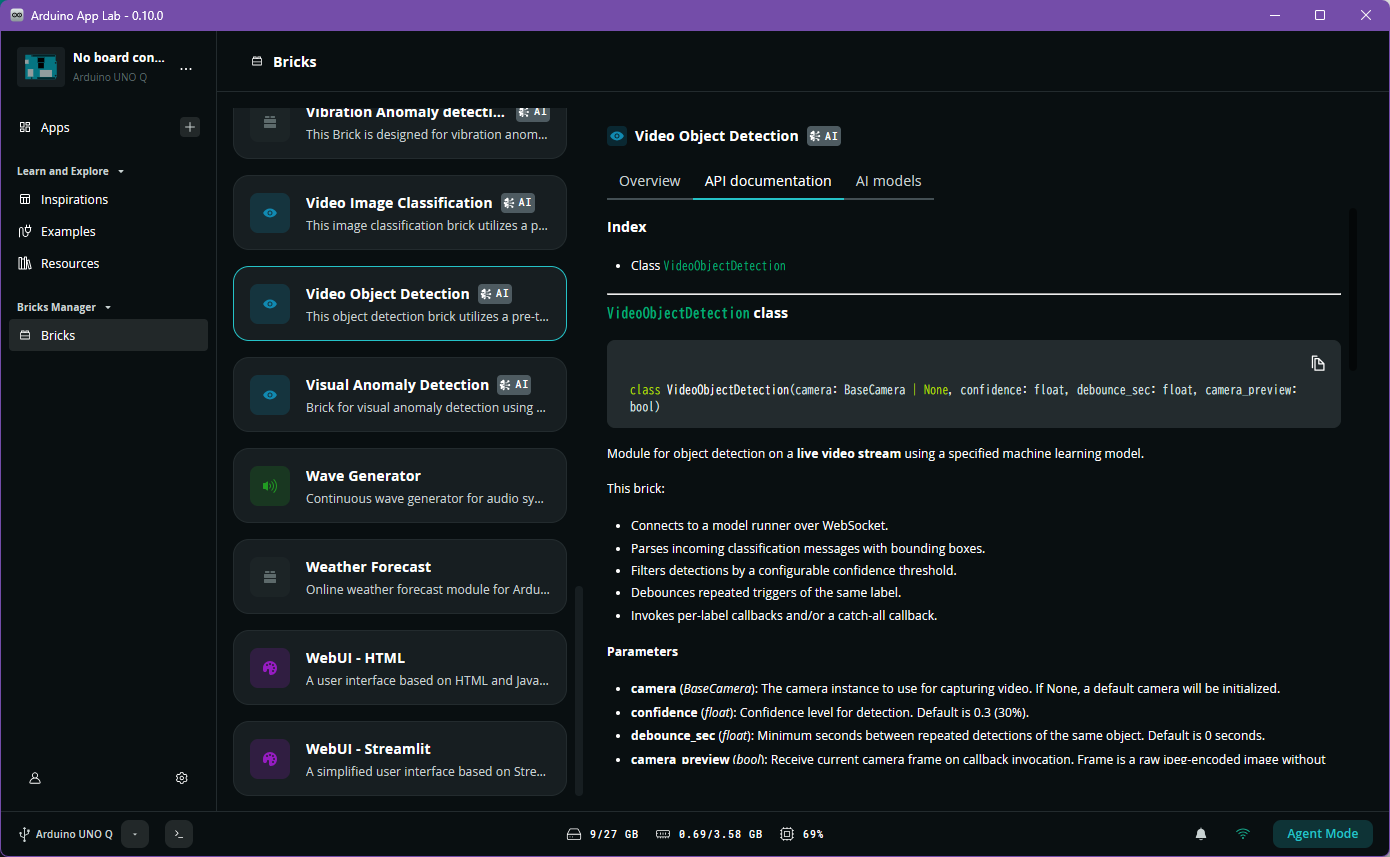
Figure 4: VideoObjectDetection Brick API Documentation
According to this document,VideoObjectDetectionIt accepts the following arguments:
- camera (
BaseCameraclass) - confidence (float type)
- debounce_sec (float type)
- camera_preview (bool type)
In the sample,confidenceanddebounce_secOnly one argument was specified, but there are two more arguments that can be specified.
cameraIf no arguments are specified, "the default camera is initialized" (translation from the API Documentation). Let's examine the source code to see exactly what camera settings are used.
cameraDefault value when no arguments are specified
cameraIf no arguments are specified, the default value is...NoneThis will be handed over.
Looking at the source code, in this case...CameraThe class is being called without any arguments.
self._camera = camera if camera else Camera()
CameraInformation about the class does not appear to be provided in the official documentation.
Let's read the source code. The official repository is arduino/app-bricks-py.
This repositoryapp-bricks-py/src/arduino/app_peripherals/camera/camera.pytoCameraThere is an implementation of the class.
In the same directoryREADME.mdUpon checking,CameraThe class uses different camera classes depending on the arguments it presents.
CSI CamerasV4L CamerasIP CamerasWebSocket Cameras
CameraLet's look at the class constructor. The arguments and their respective default values are as follows:
Table 1:CameraClass constructor arguments
| argument | Default value | Overview |
|---|---|---|
source | None | Specify the camera source.NoneIn this case, the camera is detected automatically. |
resolution | (640, 480) | Specify FRAMES resolution. |
fps | 10 | Specify FRAMES rate |
adjustments | None | Specify FRAMES adjustment function. |
**kwargs | - | Specify camera-specific parameters |
fpsThe default value of 10 may be affecting the application's FPS.
Also,sourceofNoneIf you choose this option, it will check for available cameras in the order of USB camera, then CSI camera, and use the first camera found.
Since the camera image is visible,sourceIt seems there's no need to change that.
4. Optimize camera settings
From here, let's check the camera specifications.CameraWe will adjust the class arguments.
First, check the resolution and FRAMES rate that the camera supports.
Press the ">_" (Connect to the board's shell) button in the bottom left of the Arduino App Lab.
Using the opened shell, we will investigate using the following steps.
-
1.
v4l2-ctl --list-devicesExecute the command to obtain a list of device files (files in /dev/video* format) for cameras recognized by V4L2. -
2.For the device file obtained in step 1
v4l2-ctl -d <デバイスファイル> --list-formatsRun the command to check the resolution and FRAMES rate supported by the camera. The files that are compatible with the USB camera are those whose supported formats are displayed under the "Type: Video Capture" label. -
3.
v4l2-ctl -d <2で特定したデバイスファイル> --list-formats-extRun this command to check the format, resolution, and FRAMES rate information provided by the camera.
In my environment, it was as follows: The USB camera device file/dev/video2So, the default format isYUYVThe FPS was 30.
(Example output)
arduino@unoq:~$ v4l2-ctl --list-devices
Qualcomm Venus video decoder (plat:5a00000.video-codec:dec):
        /dev/video1

Qualcomm Venus video encoder (plat:5a00000.video-codec:enc):
        /dev/video0

UVC Camera (046d:0825) (usb-xhci-hcd.2.auto-1.3):
        /dev/video2
        /dev/video3
        /dev/media0
arduino@unoq:~$ v4l2-ctl -d /dev/video2 --list-formats
ioctl: VIDIOC_ENUM_FMT
        Type: Video Capture

        [0]: 'YUYV' (YUYV 4:2:2)
        [1]: 'MJPG' (Motion-JPEG, compressed)
# --list-formats-extは長いので省略
Now let's try changing the FPS to 30.CameraSince we'll be using a class, we'll also need to add an import.
+from arduino.app_peripherals.camera import Camera

ui = WebUI()

+camera = Camera(fps=30)
-detection_stream = VideoObjectDetection(confidence=0.5, debounce_sec=0.0)
+detection_stream = VideoObjectDetection(camera, confidence=0.5, debounce_sec=0.0)
If you run it again in this state, you will notice a clear improvement in FPS.
5. Performance comparison
Let's compare the performance changes using numerical values.
This time, in order to minimize the number of lines to be changed, it will be called when FRAMES is updated.camera.captureI added a process to output the time.
from arduino.app_peripherals.camera import Camera
+import time

ui = WebUI()

camera = Camera(fps=30)
+capture = camera.capture
+camera.capture = lambda : print(time.monotonic()) or capture()
detection_stream = VideoObjectDetection(camera, confidence=0.5, debounce_sec=0.0)
When you run it, a log will be output to the console every time FRAMES is updated.
fpsIf not specified andfps=30The following is the result of analyzing the logs when this setting was specified.
Table 2: Performance comparison by FPS setting
| Drawing interval [seconds] | FPS | |
|---|---|---|
fpsunspecified | 0.20 | 5 |
fps=30 | 0.07 | 15 |
You can see that the FPS has actually tripled, from 5 to 15.
However, the measured FPS is approximately half of the set FPS.
This is likely because processing other than FRAMES acquisition (such as sending data to object detection) takes time, causing some of FRAMES captured by the camera to be missed.
This article will not delve into identifying the cause of this issue.
6. Summary
I checked the documentation and source code for the Brick that can be used with the Arduino Uno Q.
In the sample, Brick is used without any arguments, but we found that its settings can be changed by adding arguments.
When testing the performance of the Arduino Uno Q, please adjust the sample code to suit your environment before running it.
7. Reference materials
8. Nexty Electronics' Initiatives
NEXTY Electronics Corporation is a core company in the Toyota Tsusho Group's electronics business and boasts a top-class scale in the field of automotive electronics.
With technology and products at its core, we will respond to the needs of our customers and society in a wide range of fields, provide solutions to social issues, and contribute to the realization of a better society.
Furthermore, Nexty Electronics' development team also conducts in-house development and contract development (hardware and software development) utilizing the products it handles.
We will work closely with you to resolve any problems or concerns you may have, so please feel free to contact us.