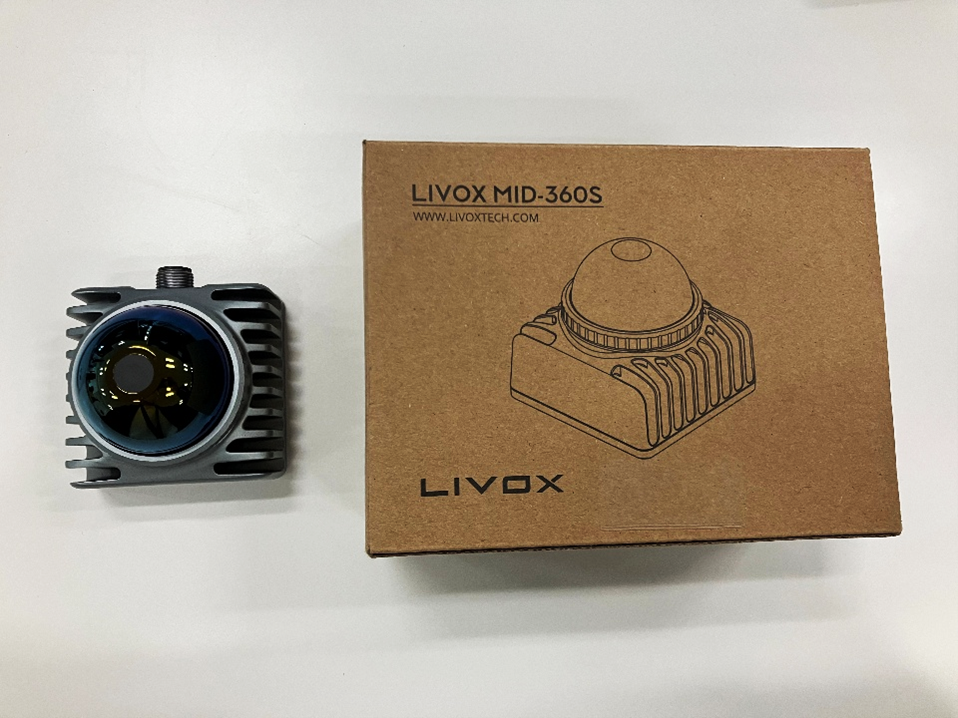
By installing the Livox MID-360 on the Turtlebot 2, we were able to achieve autonomous driving.
- It uses the MID-360's built-in IMU (Inertial Measurement Unit) and wheel odometry from the Turtlebot2.
- The robot estimates its own position from the acquired point cloud (map) and the scanned point cloud, and then drives automatically to the goal while avoiding obstacles.
-

Turtlebot2 + MID-360
-

Automatic driving to the goal
Features
By installing MID-360 on Turtlebot2 (kobuki), the robot can create maps, estimate its own position, avoid obstacles, search for routes, and navigate autonomously.
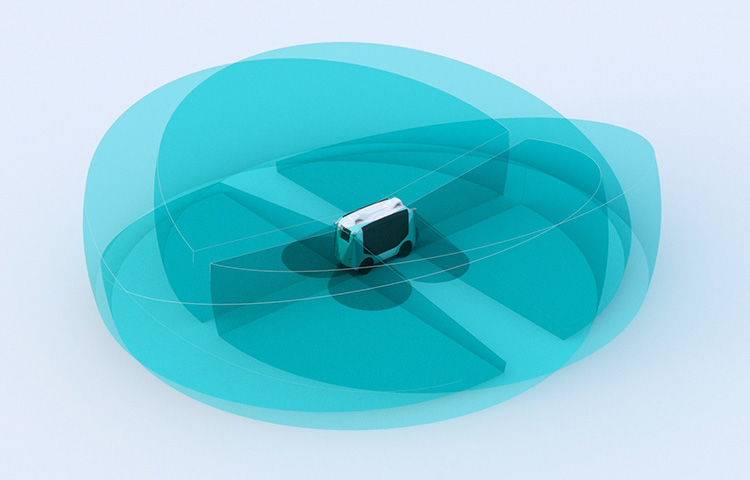
2D-LiDAR can be affected by tilt and vibration, and can lose its position, but MID-360 uses many point clouds, so it can travel without losing its position.
Furthermore, it can detect obstacles in the vertical direction, making it possible to recognize steps, protrusions, and other obstacles in space.
Hardware Configuration
Can be run on industrial PCs, Raspberry PIs, laptops, etc.
environment
ROS (Noetic)
The following software is used:
- Map creation: gmapping
- Self-localization: amcl (adaptive monte carlo localization)
- Obstacle detection, path planning: move_base
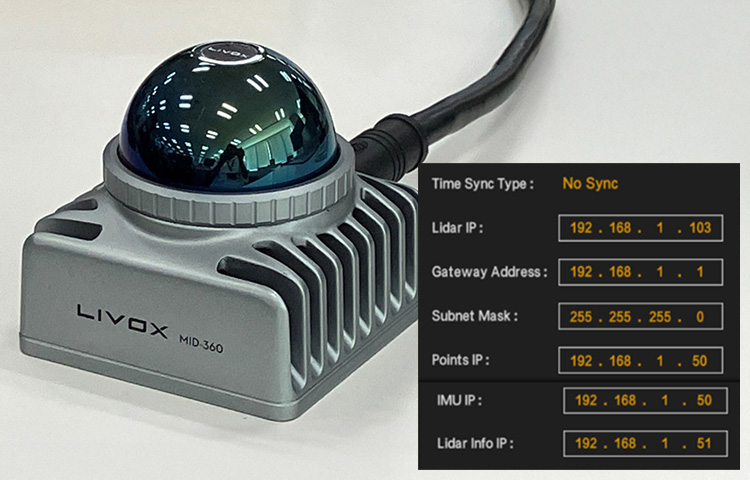
However, while MID-360 outputs in 3D PointCloud format, move_base can only handle 2D map data, so we use pointcloud_to_laserscan to convert PointCloud to LaserScan.
Also, to cut out from 3D to 2D, we set the following range this time.
Horizontal: 180° (forward direction), Vertical: -0.15 (distance from LiDAR mounting position to the ground) to 1.5m, Distance: 0.1 to 50m

set up
-
Install and set up Livox_SDK2.
- Install and set up Livox_ros_driver2.
- Install the required packages.
For details, please refer to the following website.
This time we will run it stand alone without using ROS master/slave.
Map Creation
First, let's manually operate Turtlebot2 and create a map (gmapping).
Use KEY BOARD input to move the turtlebot (you can also use a PS4 controller to move it).
Terminal-1: Starting turtlebot
$ roslaunch turtlebot_bringup miniml.launch
Terminal-2: Start Livox_ros_driver
$ roslaunch livox_ros_driver2 pcd_MID360_p2s.launch
Set xfer_format to "0" and limit the point cloud area using pointcloud_to_laserscan.
Horizontal: 180° (forward direction), Vertical: -0.15 (distance from LiDAR mounting position to the ground) to 1.5m, Distance: 0.1 to 50m
<launch>

  <!--user configure parameters for ros start-->
  <arg name="lvx_file_path" default="livox_test.lvx"/>
  <arg name="bd_list" default="100000000000000"/>
  <arg name="xfer_format" default="0"/>
  <arg name="multi_topic" default="0"/>
  <arg name="data_src" default="0"/>
  <arg name="publish_freq" default="10.0"/>
  <arg name="output_type" default="0"/>
  <arg name="rviz_enable" default="false"/>
  <arg name="rosbag_enable" default="false"/>
  <arg name="cmdline_arg" default="$(arg bd_list)"/>
  <arg name="msg_frame_id" default="livox_frame"/>
  <arg name="lidar_bag" default="true"/>
  <arg name="imu_bag" default="true"/>
  <!--user configure parameters for ros end-->

  <param name="xfer_format" value="$(arg xfer_format)"/>
  <param name="multi_topic" value="$(arg multi_topic)"/>
  <param name="data_src" value="$(arg data_src)"/>
  <param name="publish_freq" type="double" value="$(arg publish_freq)"/>
  <param name="output_data_type" value="$(arg output_type)"/>
  <param name="cmdline_str" type="string" value="$(arg bd_list)"/>
  <param name="cmdline_file_path" type="string" value="$(arg lvx_file_path)"/>
  <param name="user_config_path" type="string" value="$(find livox_ros_driver2)/config/MID360_config.json"/>
  <param name="frame_id" type="string" value="$(arg msg_frame_id)"/>
  <param name="enable_lidar_bag" type="bool" value="$(arg lidar_bag)"/>
  <param name="enable_imu_bag" type="bool" value="$(arg imu_bag)"/>

  <node name="livox_lidar_publisher2" pkg="livox_ros_driver2"
        type="livox_ros_driver2_node" required="true"
        output="screen" args="$(arg cmdline_arg)"/>

  <group if="$(arg rviz_enable)">
      <node name="livox_rviz" pkg="rviz" type="rviz" respawn="true"
              args="-d $(find livox_ros_driver2)/config/display_point_cloud_ROS1.rviz"/>
  </group>

  <group if="$(arg rosbag_enable)">
      <node pkg="rosbag" type="record" name="record" output="screen"
                args="-a"/>
  </group>

  <!-- Run pointcloud_to_laserscan -->
  <node pkg="pointcloud_to_laserscan" type="pointcloud_to_laserscan_node" name="pointcloud_to_laserscan_node" output="screen" >
      <remap from="cloud_in" to="/livox/lidar" />
      <remap from="scan" to="/pointcloud_scan" />
      <param name="target_frame" value="livox_frame" />
      <param name="min_height" value="-0.15" />
      <param name="max_height" value="1.5" />
      <param name="angle_min"  value="-1.5708" />
      <param name="angle_max"  value="1.5708" />
      <param name="angle_increment"  value="0.0026" />
      <param name="range_min"  value="0.1" />
      <param name="range_max"  value="50" />
      <param name="use_inf" value="true" />
  </node>

</launch>
Terminal-3: Launch gmapping
$ roslaunch turtlebot_navigation gmappig_livox.launch
<launch>
<arg name="3d_sensor" default="livox"/>  <!-- r200, kinect, asus_xtion_pro -->

<!-- Gmapping -->
<arg name="custom_gmapping_launch_file" default="$(find turtlebot_navigation)/launch/includes/gmapping/$(arg 3d_sensor)_gmapping.launch.xml"/>
<include file="$(arg custom_gmapping_launch_file)"/>

<!-- Move base -->
<include file="$(find turtlebot_navigation)/launch/includes/move_base.launch.xml"/>

</launch>
In livox_gmapping.launch.xml and move_base.launch.xlm, change the topic name of the input point cloud.
・livox_gnmapping.launch.xml
<!-- arg name="scan_topic"  default="scan" / -->
<arg name="scan_topic"  default="/pointcloud_scan" />

・move_base.launch.xml
<!-- arg name="laser_topic" default="scan" / -->
<arg name="laser_topic" default="/pointcloud_scan" />
Terminal-4: Launch rviz
$ roslaunch turtlebot_rviz_launchers view_navigation.launch
Terminal-5: Launching KEY BOARD input
$ roslaunch turtlebot_teleop keyboard_teleop.launch
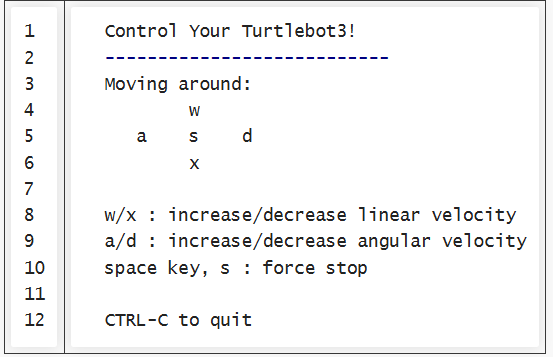
The following text will be displayed, so press the letters on KEY BOARD to move in the direction you want.
Map data is created by moving the robot little by little.
Terminal-6: Save Map
Once you have finished creating the map, save the data.
$ rosrun map_server map_server -f [file_name]
Two files, [file_name].yaml and [file_name].pgm, will be created in the directory where you executed the command.
This completes the map creation.
Map creation with gmapping
Self-location estimation and autonomous driving
Load the saved map, perform self-location estimation (AMCL), specify the goal and perform autonomous driving.
Terminal-1: Starting turtlebot
$ roslaunch turtlebot_bringup miniml.launch
Terminal-2: Start Livox_ros_driver
$ roslaunch livox_ros_driver2 pcd_MID360_p2s.launch
Terminal-3: Start amcl
$ roslaunch turtlebot_navigation amcl_livox.launch
Specify the location of the saved map data (in red).
The initial positions are all set to 0.0 because we use rviz's "2D Pose Estimate".
<launch>
<arg name="3d_sensor" default="livox"/>  <!-- r200, kinect, asus_xtion_pro -->

<!-- Map server -->
<arg name="map_file" default="$(find turtlebot_navigation)/maps/[file_name].yaml"/>
<node name="map_server" pkg="map_server" type="map_server" args="$(arg map_file)" />

<!-- AMCL -->
<arg name="custom_amcl_launch_file" default="$(find turtlebot_navigation)/launch/includes/amcl/$(arg 3d_sensor)_amcl.launch.xml"/>
<arg name="initial_pose_x" default="0.0"/> <!-- Use 17.0 for willow's map in simulation -->
<arg name="initial_pose_y" default="0.0"/> <!-- Use 17.0 for willow's map in simulation -->
<arg name="initial_pose_a" default="0.0"/>
<include file="$(arg custom_amcl_launch_file)">
  <arg name="initial_pose_x" value="$(arg initial_pose_x)"/>
  <arg name="initial_pose_y" value="$(arg initial_pose_y)"/>
  <arg name="initial_pose_a" value="$(arg initial_pose_a)"/>
</include>

<!-- Move base -->
<arg name="custom_param_file" default="$(find turtlebot_navigation)/param/$(arg 3d_sensor)_costmap_params.yaml"/>
<include file="$(find turtlebot_navigation)/launch/includes/move_base.launch.xml">
  <arg name="custom_param_file" value="$(arg custom_param_file)"/>
</include>

</launch>
In livox_amcl.launch.xml, change the topic name of the input point cloud.
・livox_amcl.launch.xml
<!-- arg name="scan_topic"  default="scan" / -->
<arg name="scan_topic"  default="/pointcloud_scan" />
Terminal-4: Launch rviz
$ roslaunch turtlebot_rviz_launchers view_navigation.launch
Terminal-5: Launching KEY BOARD input
$ roslaunch turtlebot_teleop keyboard_teleop.launch
After running "2D Pose Estimate", start the robot to rotate and estimate its position.
Performing self-localization
The map will be displayed on rviz and the TurtleBot will be visible.
Use the green arrow "2d Pose Estimate" to roughly specify the initial position and orientation.

Then, use KEY BOARD to rotate the Turtlebot and estimate its position (the map will move).
Once the Turtlebot's position matches the map, stop turtlebot_teleop in Terminal-5 using Ctrl+c. (If you do not stop it, it will not be able to drive automatically.)
Finally, use "2D Nav Goal" to specify the goal location and the orientation upon arrival.

The Turtlebot will start moving automatically, avoiding any obstacles along the way as it moves towards the goal.
AMCL and Autonomous Driving
![Making your own CABLES for the Livox MID-360 [Practical Guide]](/uploads/media_files/livox_10_thumbnail-3954867486.jpg)